Installation
HeartLab Agent
The HeartLab Agent is a Windows and macOS application that enables HeartLab to communicate securely with clinical data on your local network. Once installed, the Agent can be used to automatically upload cardiac stress tests, standalone PDF content, and to deliver completed reports.
Installing the HeartLab Agent
Install the HeartLab Agent on a computer that is powered on, remains logged in, and has a reliable network connection. Prevent the computer from sleeping while the Agent is needed.
To install the HeartLab Agent:
- Navigate to Settings → Integrations → Agent.
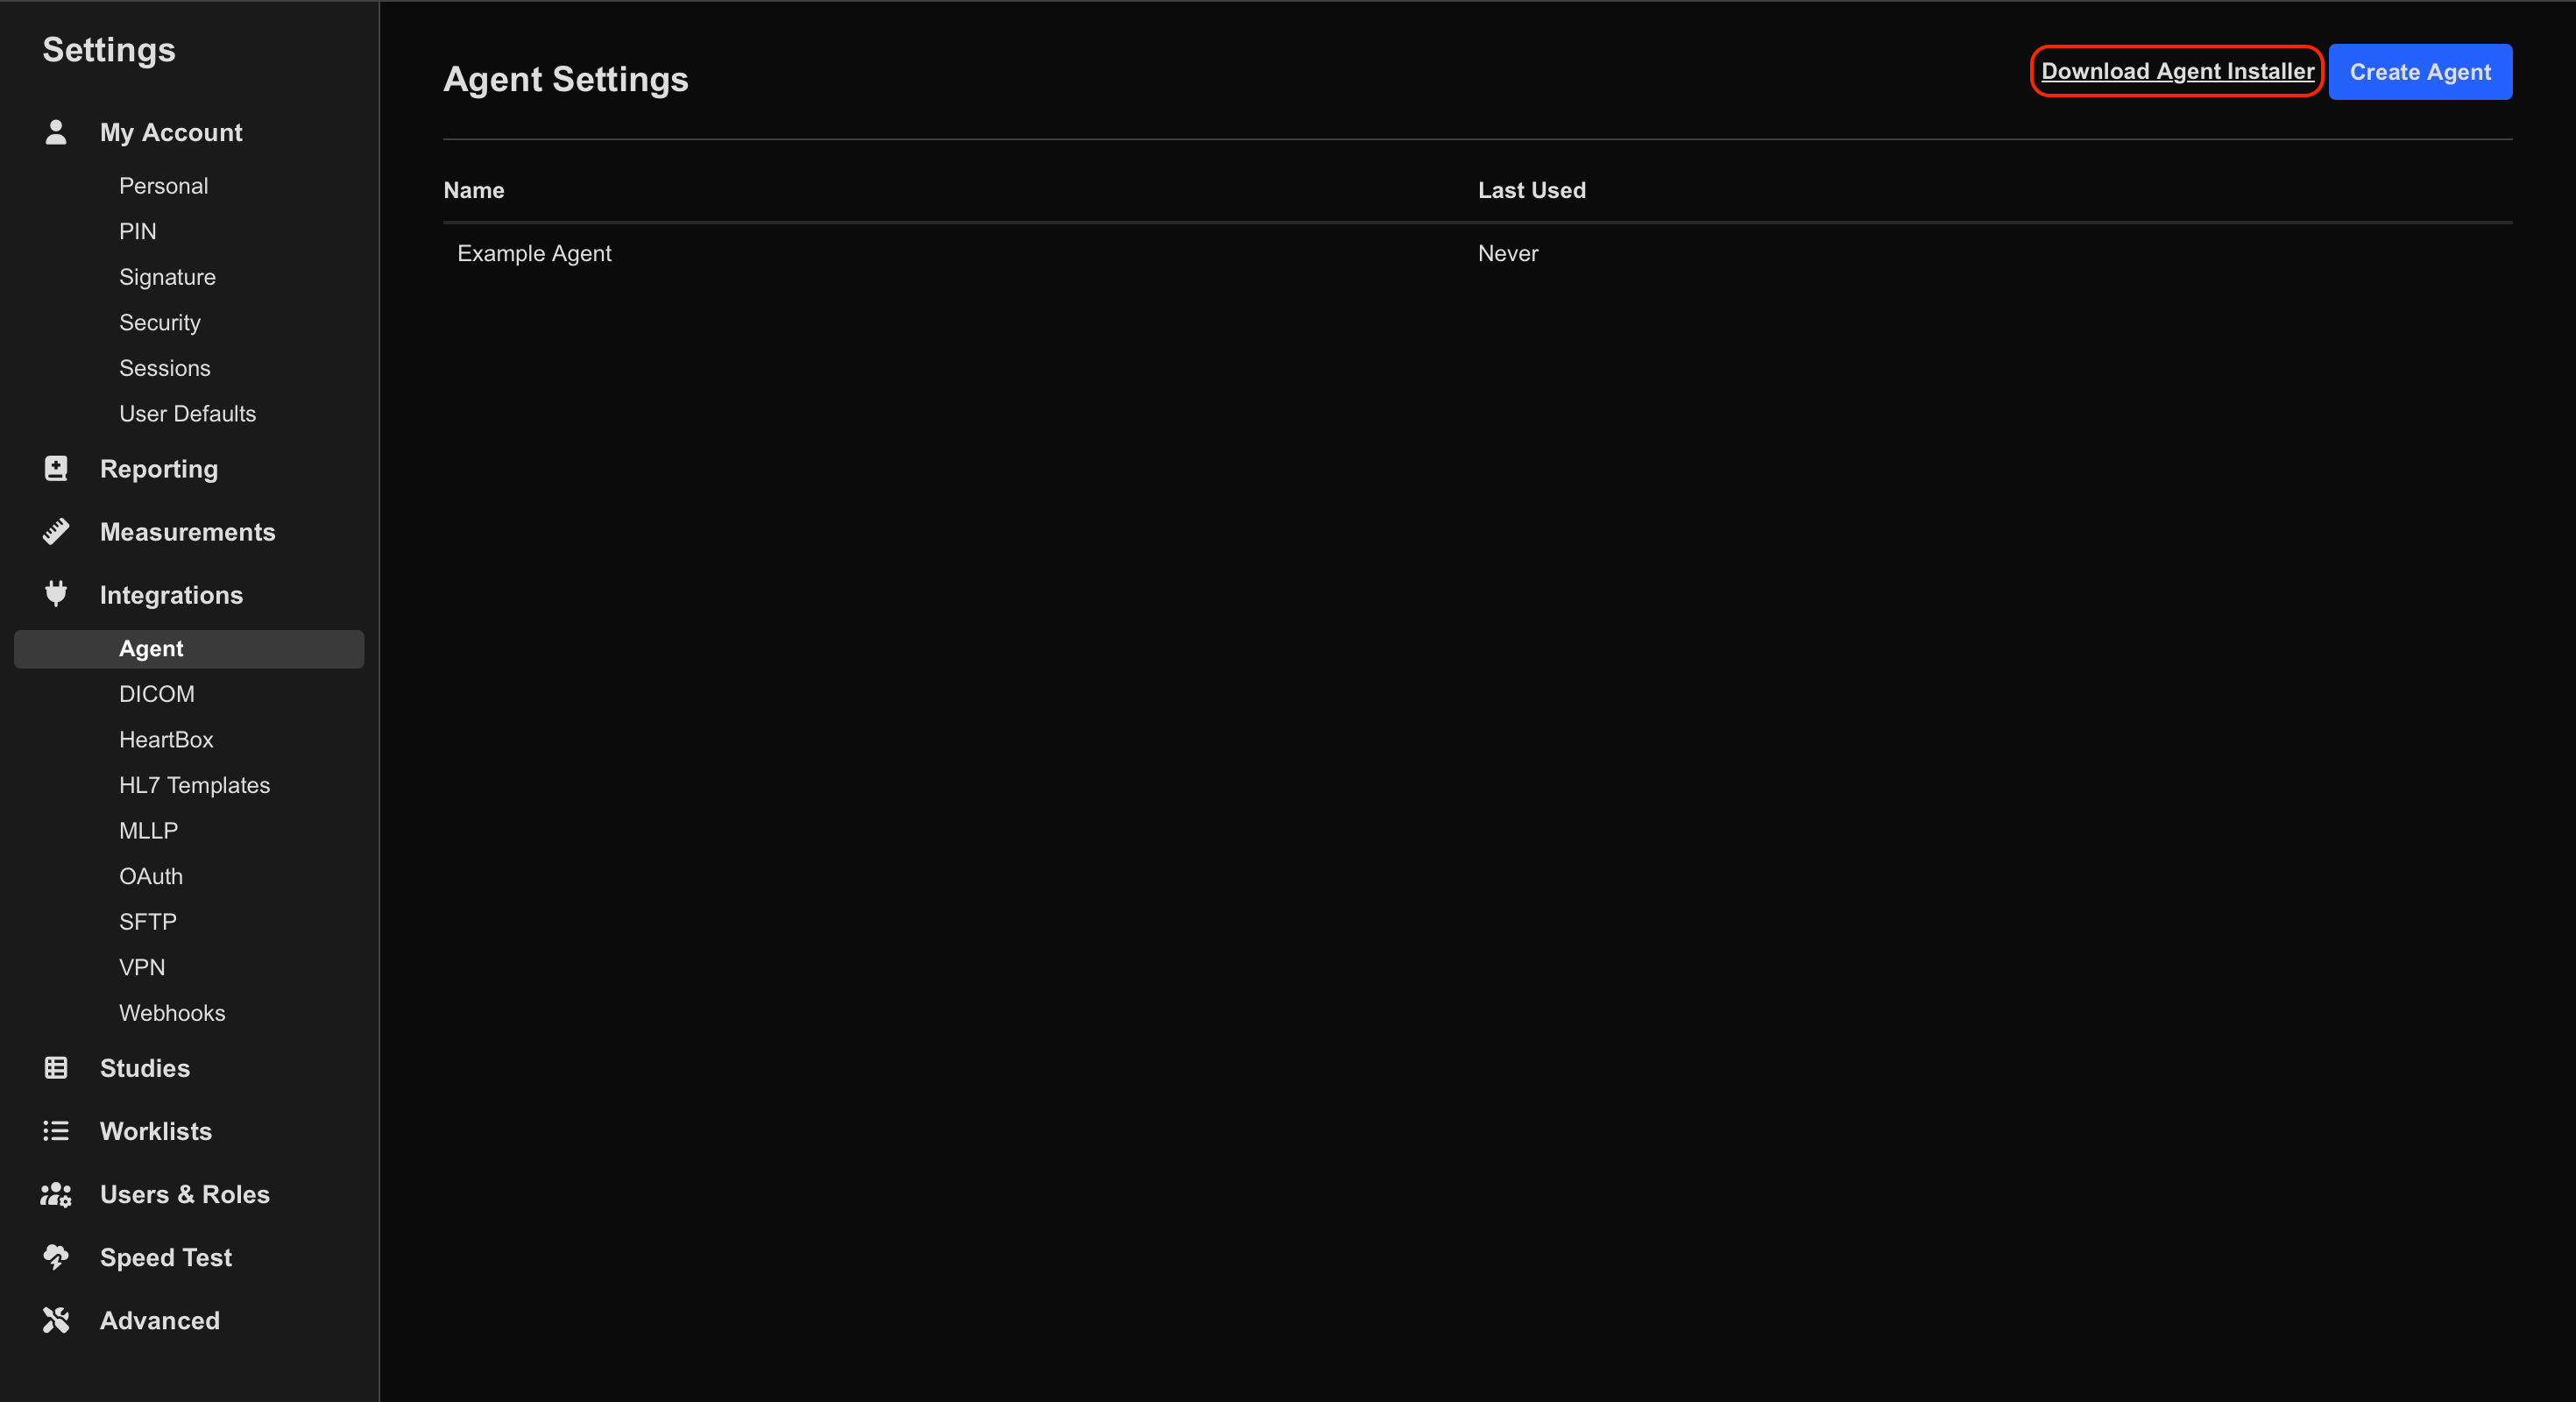
- Select Download, then choose Windows or macOS for the computer where the Agent will run.
Windows
- Run the downloaded
.exeinstaller and follow the installation prompts. - Open HeartLab Agent.
The Agent starts automatically when you log in and is available from the Windows system tray.
macOS
- Open the downloaded
.dmgdisk image. - Drag HeartLab Agent into the Applications folder.
- Open HeartLab Agent from Applications, then eject the disk image.
The Agent starts automatically when you log in and is available from the macOS menu bar. It does not appear in the Dock.
Authenticate the HeartLab Agent
After installation:
- Navigate to Settings → Integrations → Agent.
- Select Create Agent.
- Enter an Agent name (typically the name of the computer where it is installed).
- Select Create Agent.
- Locate the following information:
- Agent URL
- Agent Token
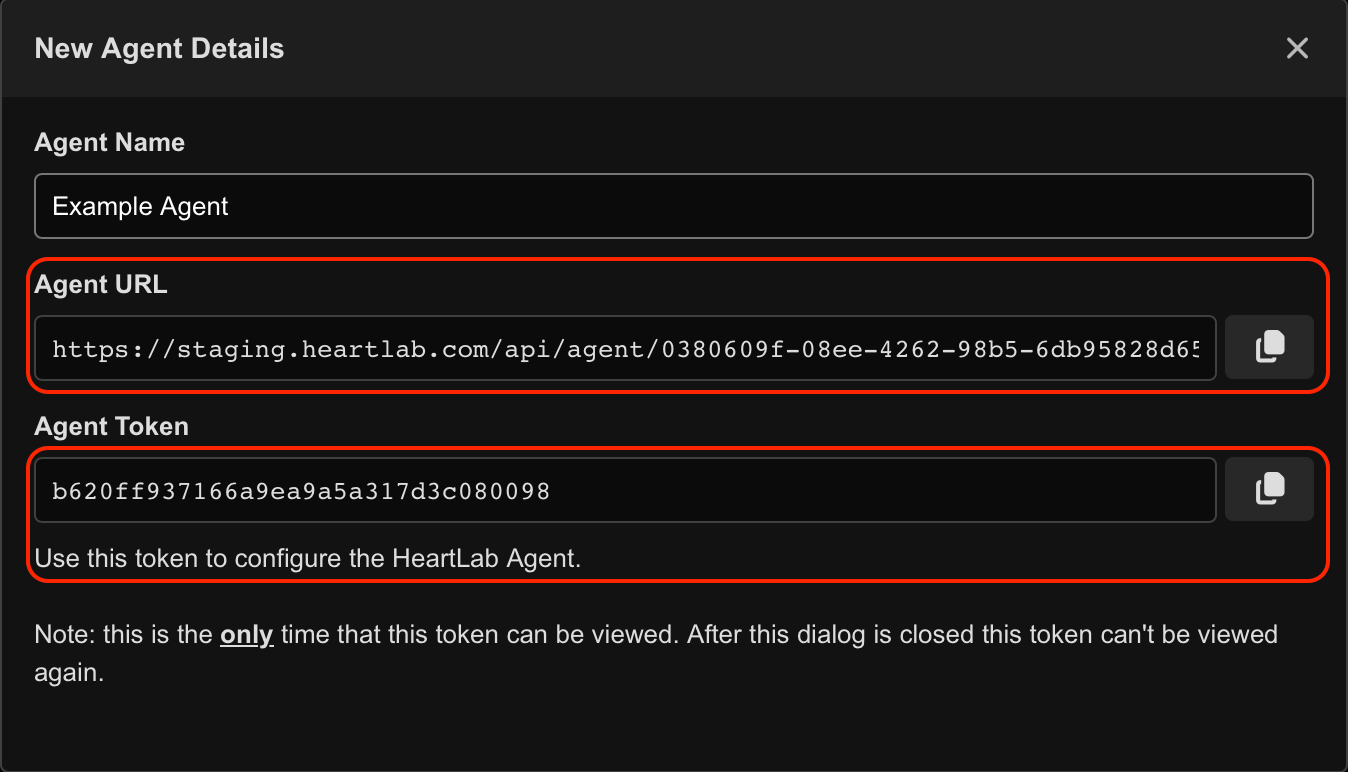
- Open the HeartLab Agent.
- Open the Authentication tab.
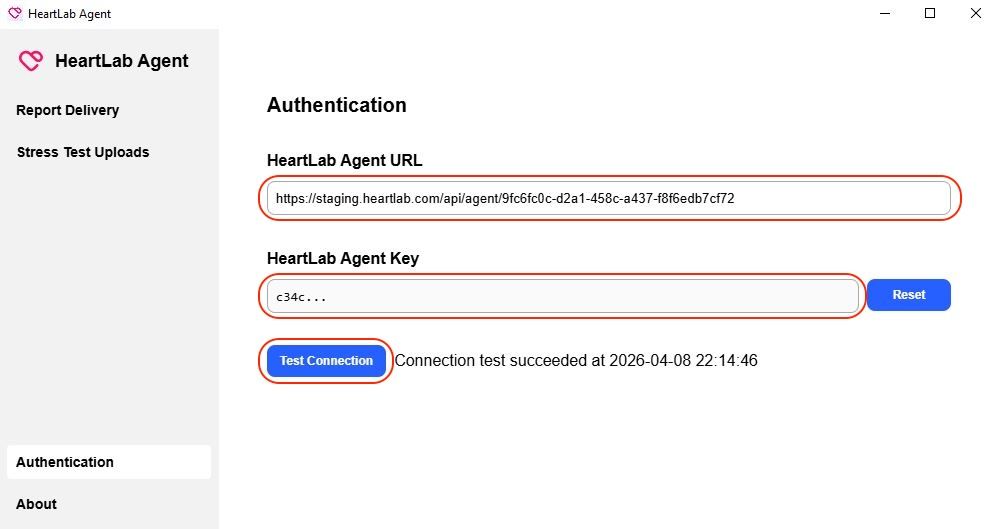
- Enter the Agent URL and Agent Token values.
- Select Test Connection.
- Confirm the message says
Connection test succeeded
Once authenticated, the HeartLab Agent is ready to be used with supported HeartLab features.
Troubleshooting
If the Agent does not connect to HeartLab:
- Verify the Agent URL is correct.
- Verify the Agent Token has been entered correctly.
- Confirm the computer has internet access.
- Confirm no firewall or security software is blocking the HeartLab Agent.
- Re-run Test Connection.
If authentication still fails, create a new Agent and repeat the authentication process.
If problems persist, contact HeartLab Support.
 MFR
MFR