Clip List
Clip List
The Clip List displays all images and clips associated with a study and provides tools to:
- Navigate between clips
- Preview clips before opening them
- Organise clips by series or view
- Review clip metadata
- Adjust the Clip List size
These tools help users efficiently review studies and locate relevant images during reporting, measurement, and quality assurance workflows.
Resize the Clip List
- Open the Study Viewer.
- Locate the divider on the left edge of the Clip List.
- Select and drag the divider:
- Left to expand the Clip List and display more thumbnails
- Right to reduce the Clip List size
- Release the divider to retain the new layout.
Preview Clips
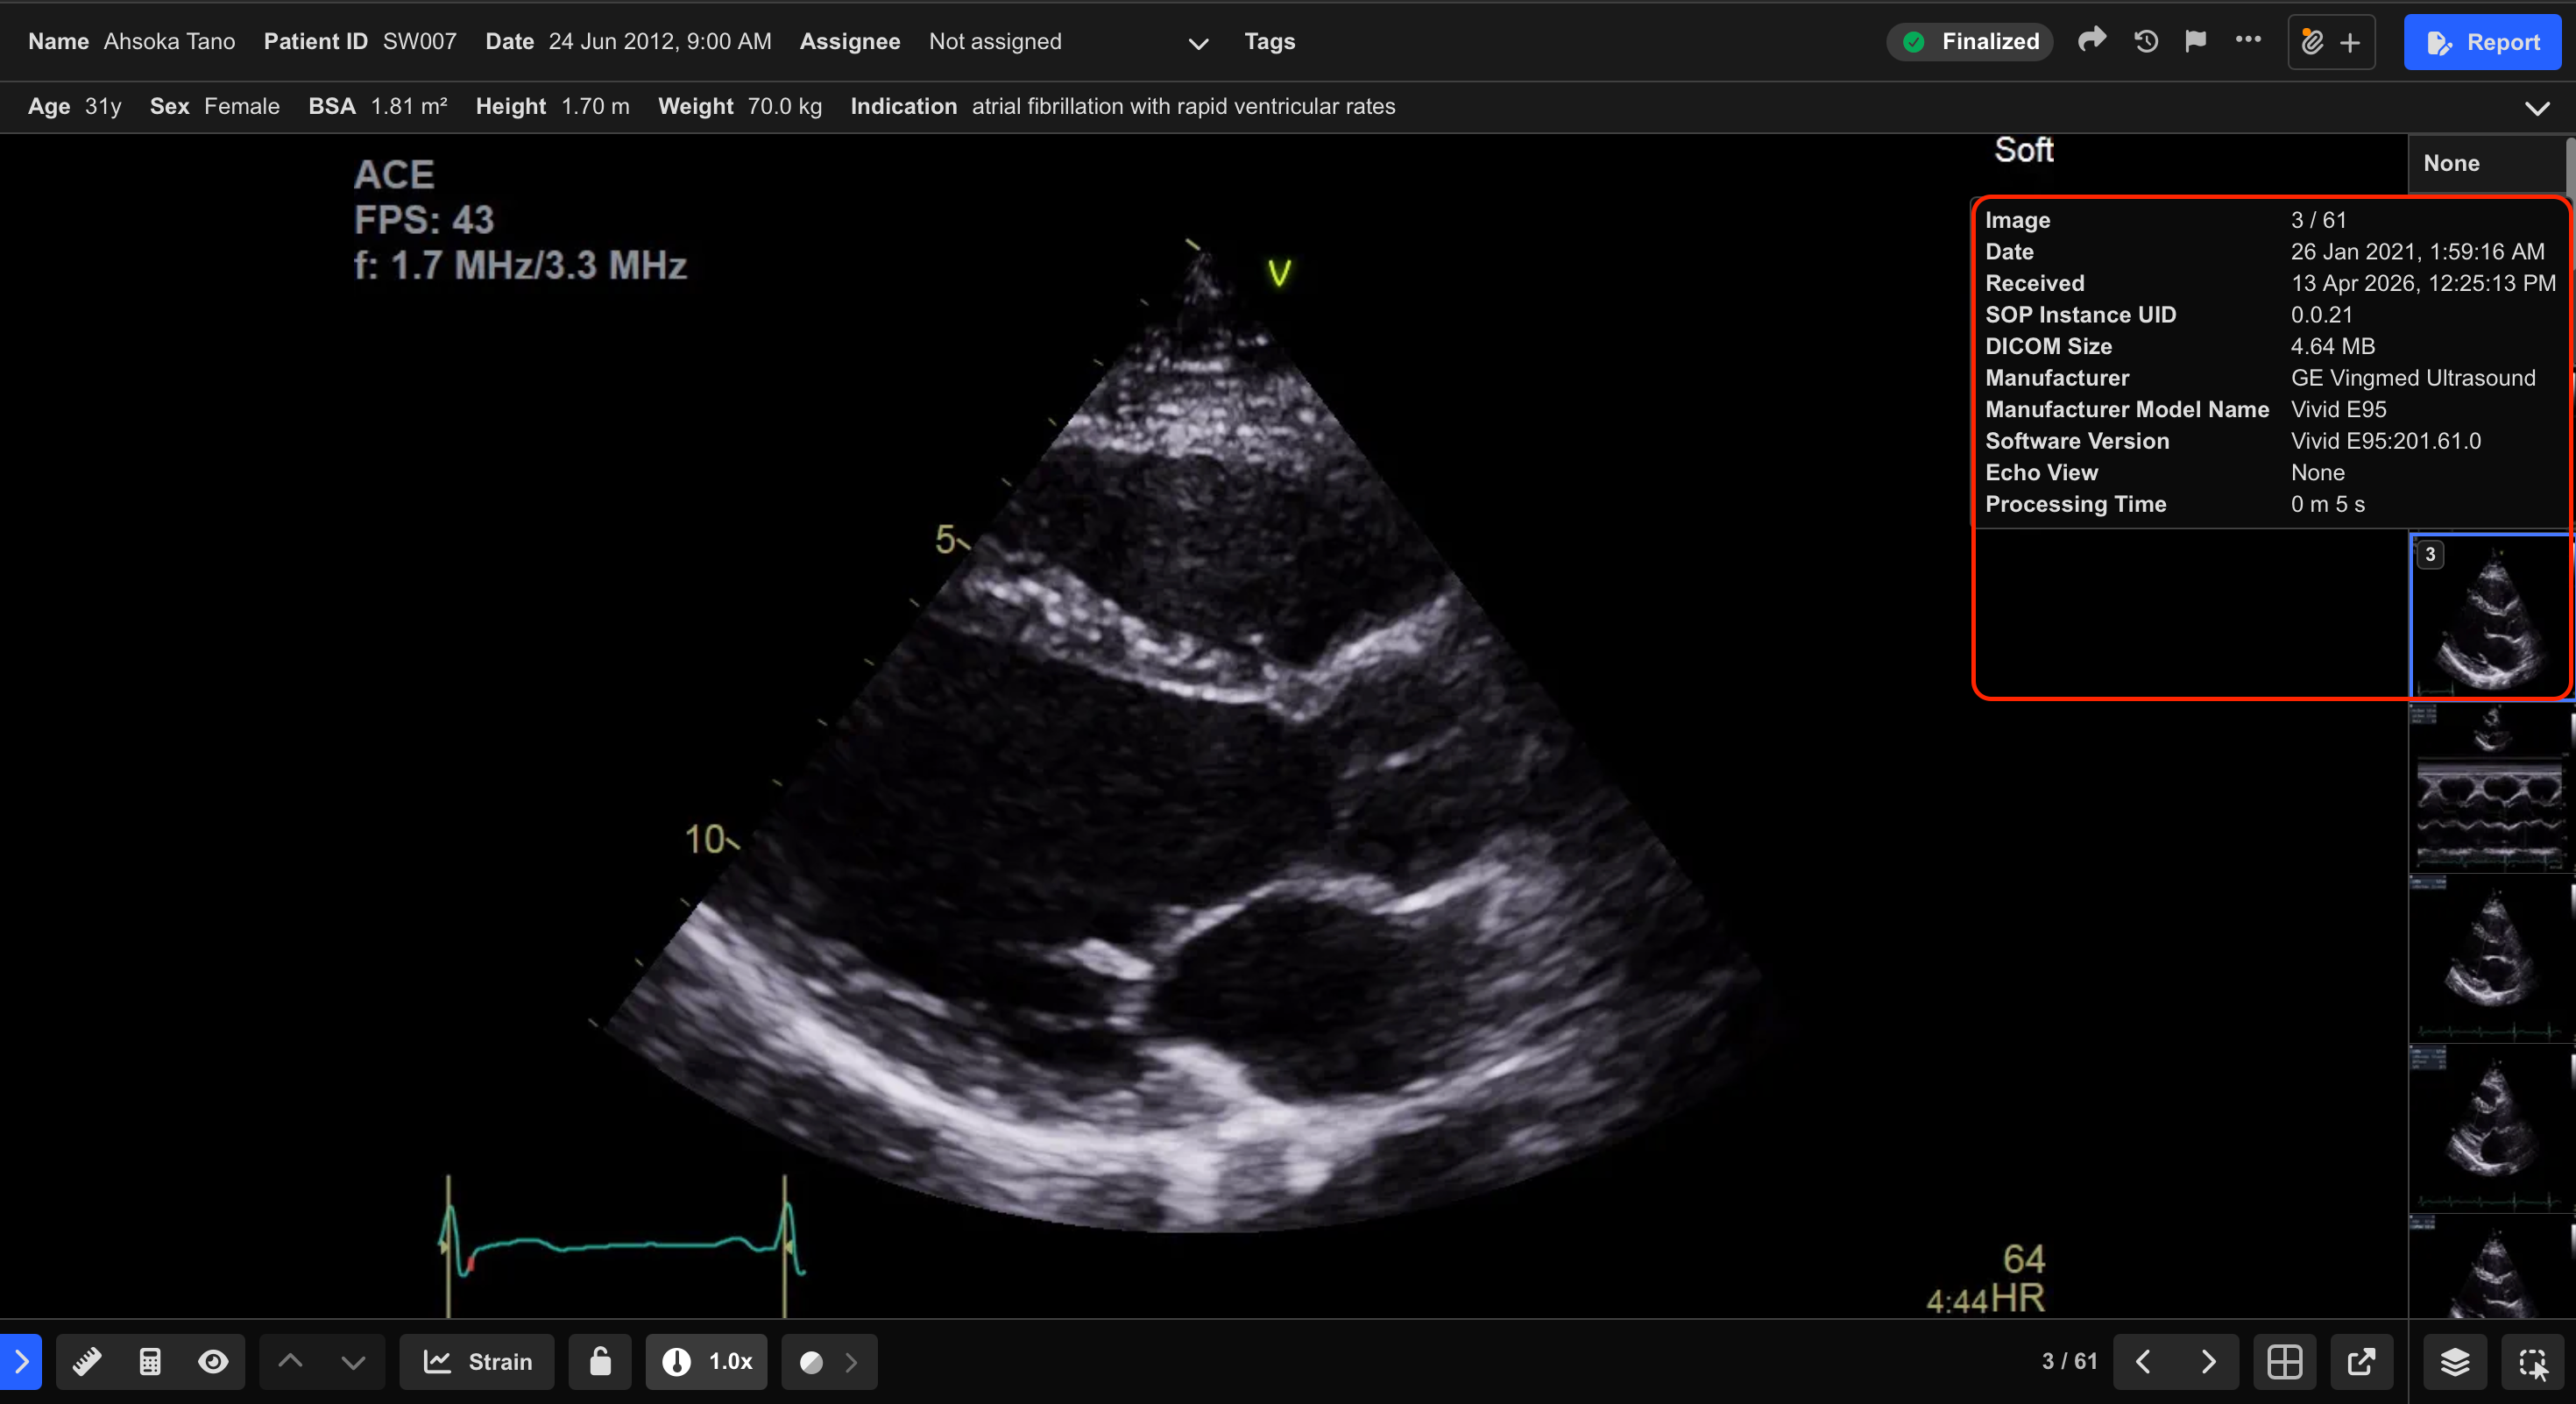
Hover over a clip thumbnail to preview the clip without opening it in the Cine View.
Additional clip information is also displayed in the tooltip, including:
- Study date and time
- Date and time the clip was received by HeartLab
- SOP Instance UID
- DICOM file size (KB)
- Processing time
- Image number and total image count
This information can assist with study validation, troubleshooting, and identifying specific images within large studies.
Group Clips
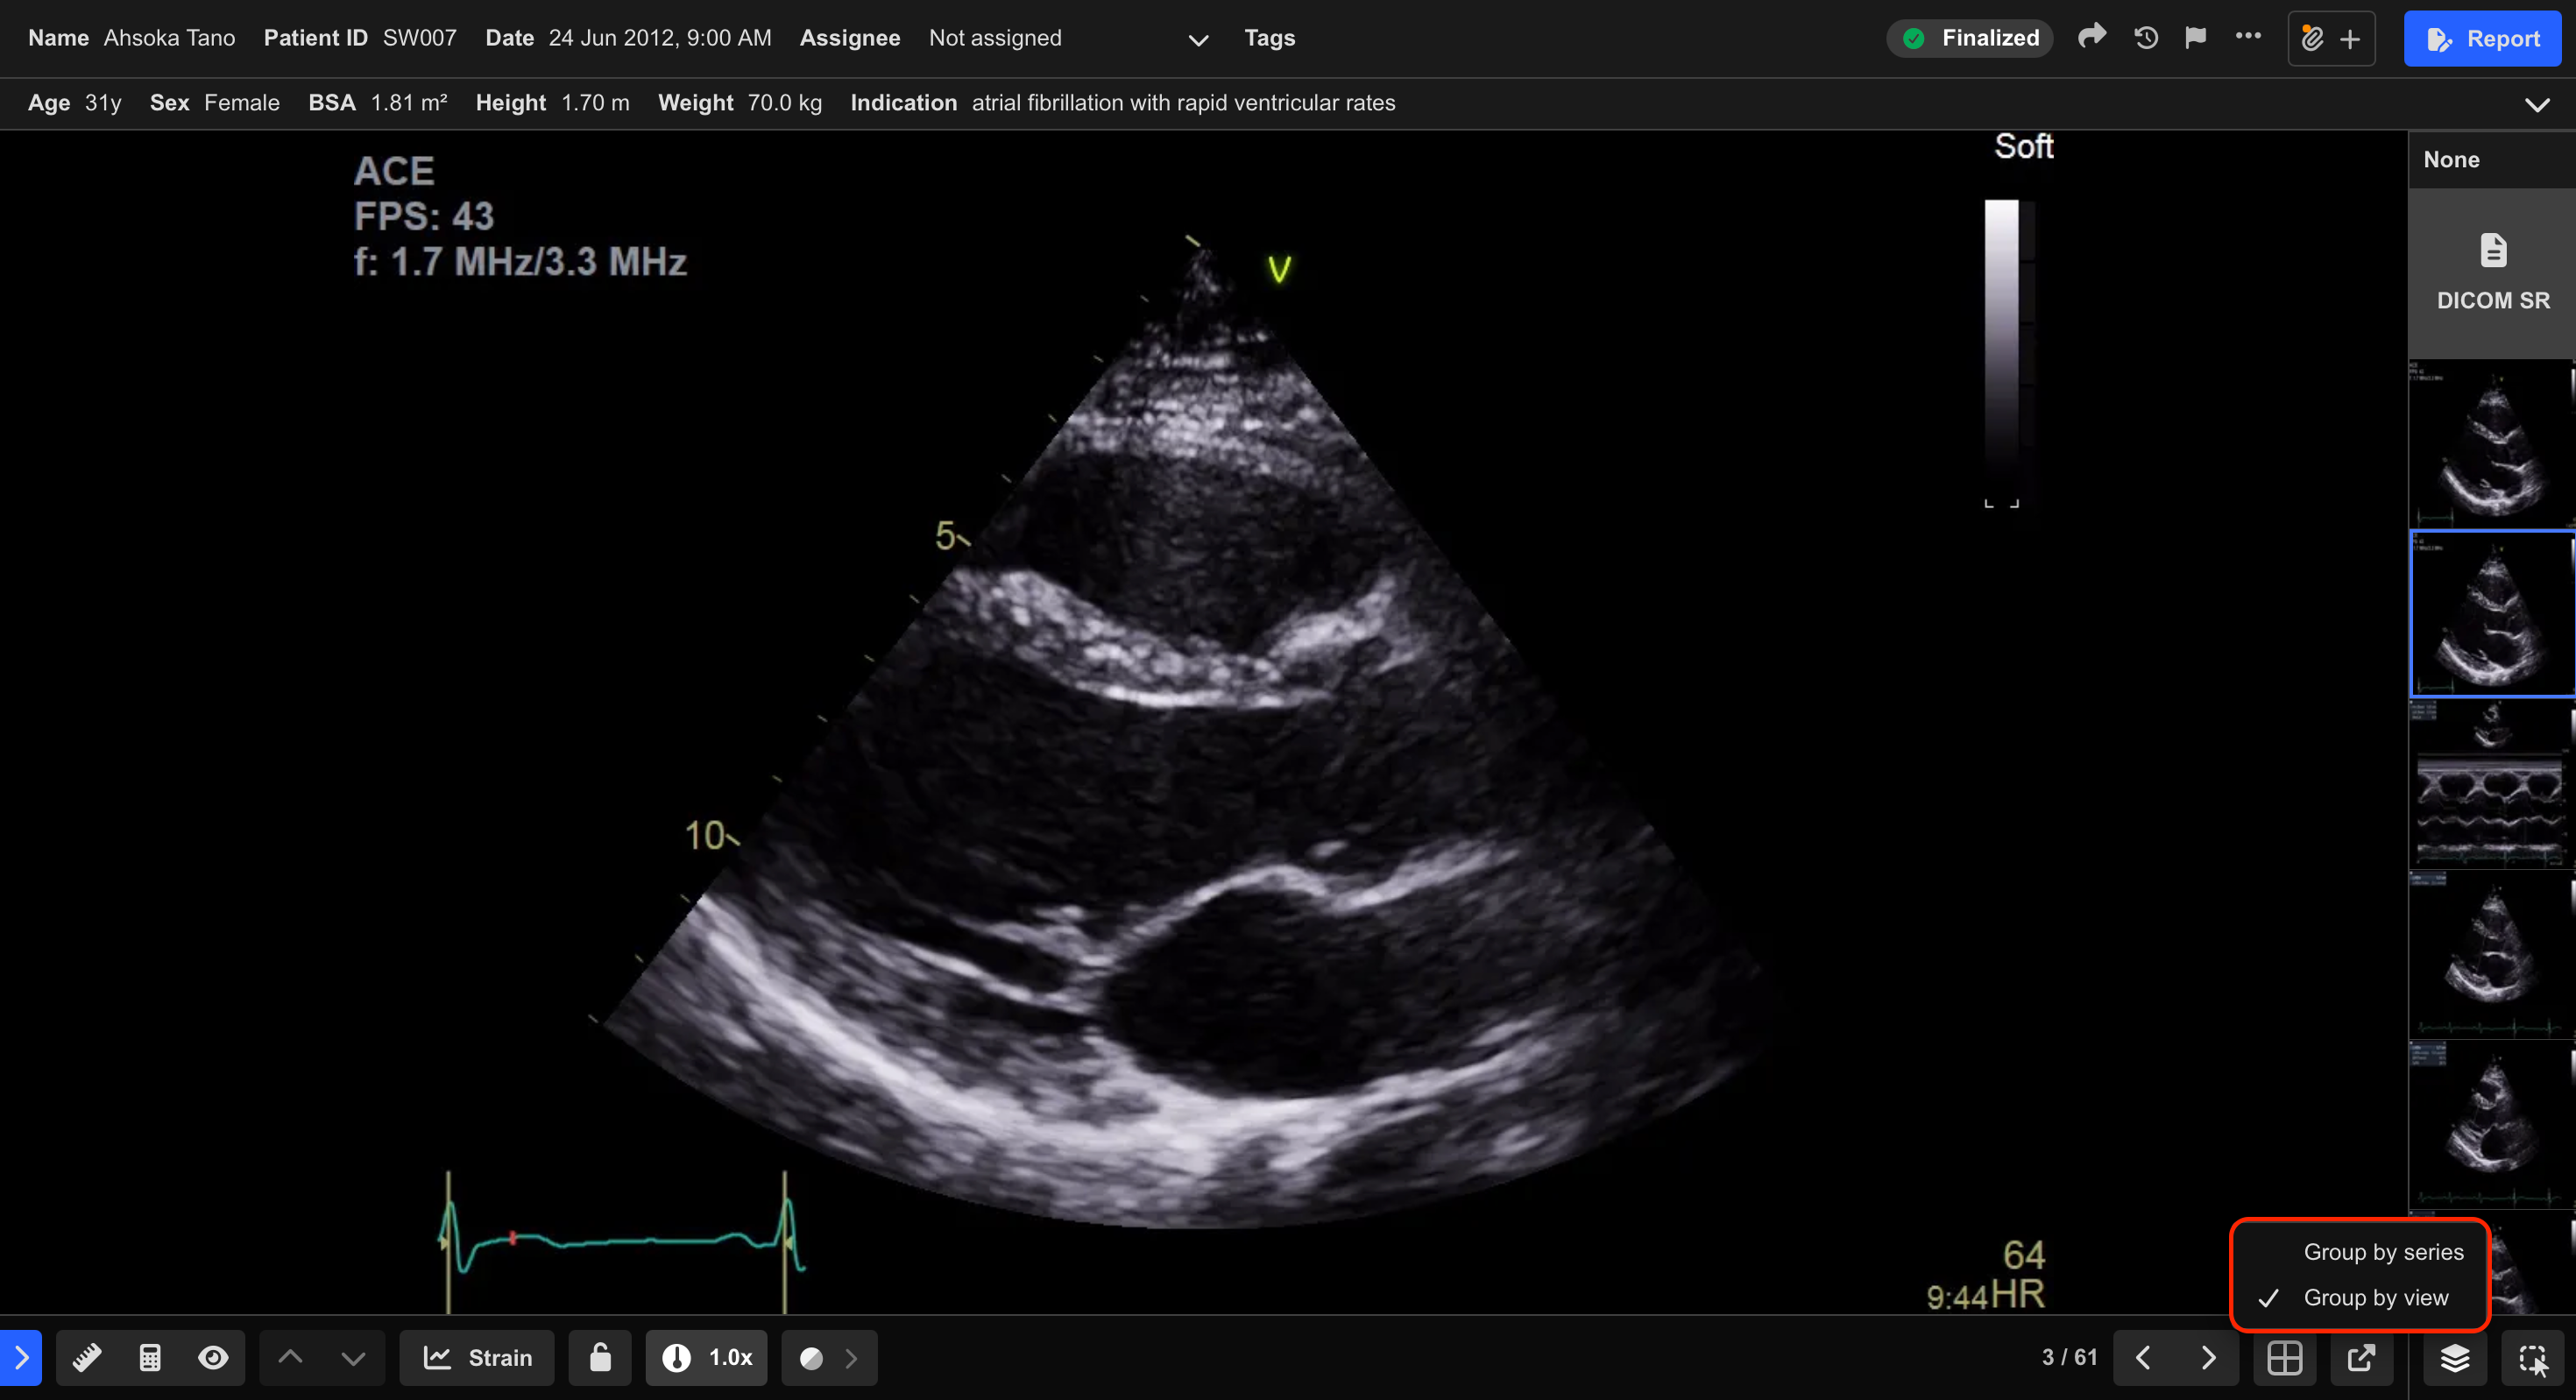
HeartLab can organise clips using different grouping methods to make study navigation easier.
- Open the Study Viewer.
- Select the Group Images icon in the bottom-right corner of the Clip List.
- Choose one of the following options:
- Group by Series (default)
- Group by View
The Clip List updates immediately using the selected grouping method.
Group by Series
Groups clips according to the original DICOM series structure received from the source device.
This view is useful when:
- Reviewing studies as acquired
- Validating incoming DICOM data
- Troubleshooting acquisition or import issues
Group by View
Groups clips according to their echocardiography view classification.
This view is useful when:
- Reviewing studies for reporting
- Comparing similar views together
- Performing measurements and clinical interpretation
Change a View Classification
If a clip has been assigned an incorrect view classification:
- Right-click the clip.
- Select the appropriate view classification.
- Confirm the change if prompted.
The clip will be updated and displayed under the selected view classification when using Group by View.