Connectivity
Butterfly
Connect Butterfly to HeartLab using DICOM over TLS and configure automatic study export.
Butterfly Integration
This guide explains how to configure a Butterfly device and Butterfly Network to securely send DICOM studies to HeartLab PACS using DICOM over TLS.
Before You Begin
If you cannot see the required DICOM settings within HeartLab, your role may not have the necessary integration permissions enabled.
You will require:
- Access to HeartLab administrative settings
- Access to Butterfly Network administration
- Permission to create DICOM integrations
Information Required for Setup
The first step is to gather the HeartLab DICOM connection details.
- Sign in to HeartLab.
- Navigate to:
- Settings → Integrations → DICOM
- Select View DICOM Endpoints.
- Under DICOM via TLS, note the following values:
- Server AE Title
- Server IP Address
- TLS Port (
11112)
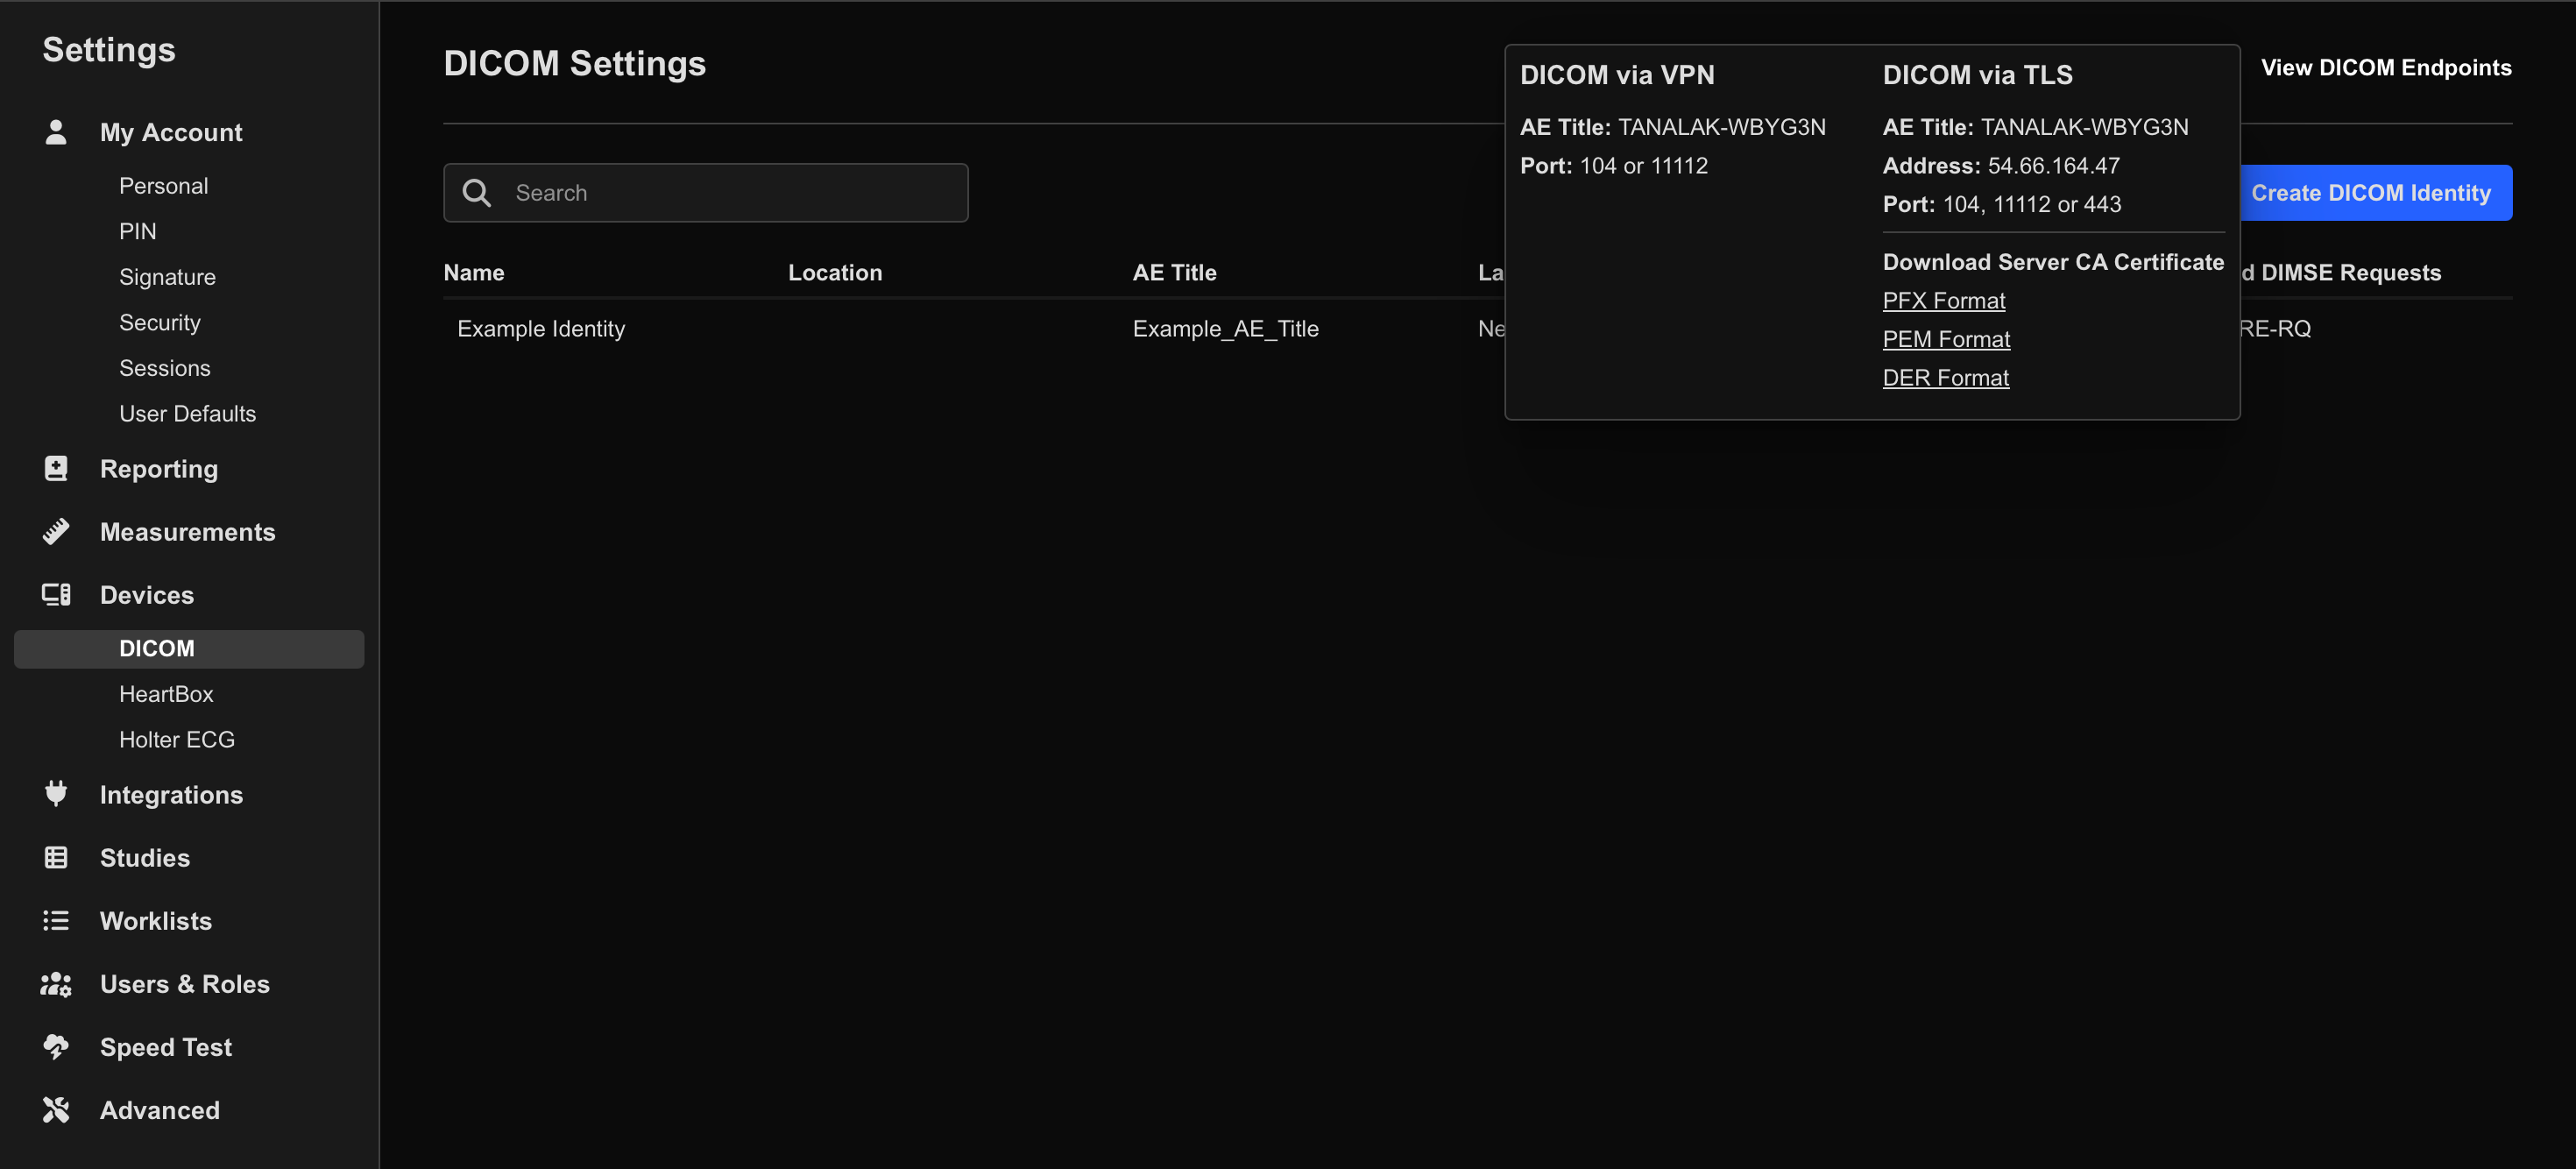
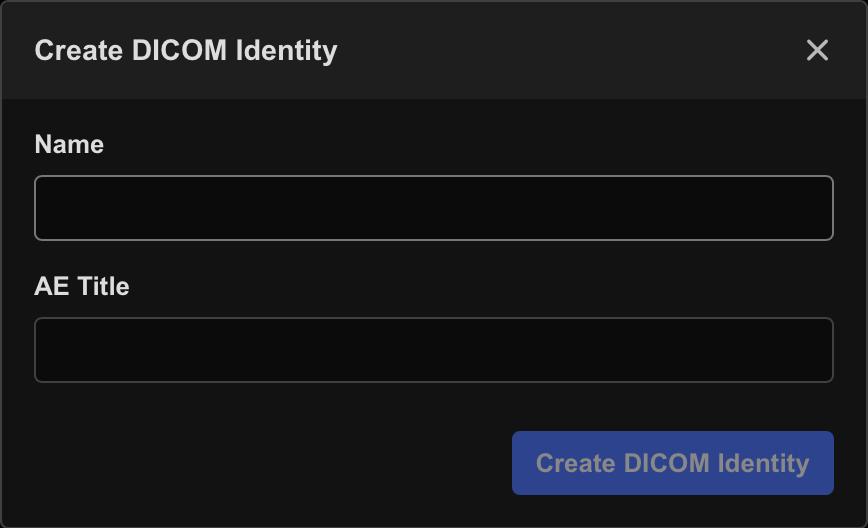
Next, create a DICOM Identity in HeartLab.
- Select Create DICOM Identity.
- Enter:
- Name: A recognizable device or system name
- AE Title: A short unique device AE title
You will need the following values later during Butterfly configuration:
- Server AE Title
- Server IP Address
- Device AE Title
See:
Download the Server Certificate
Butterfly requires the HeartLab TLS certificate in PEM format.
To download the certificate:
- Navigate to:
- Settings → Integrations → DICOM
- Select View DICOM Endpoints.
- Under Download Server CA Certificate, select:
- PEM Format
Save the downloaded certificate file for later use.
Create the TLS Connection in Butterfly
Next, configure the secure TLS connection within Butterfly Network.
- Sign in to Butterfly Network using an administrator account.
- Navigate to:
- Organization Settings → Connectivity
- Select + Add beside Connections.
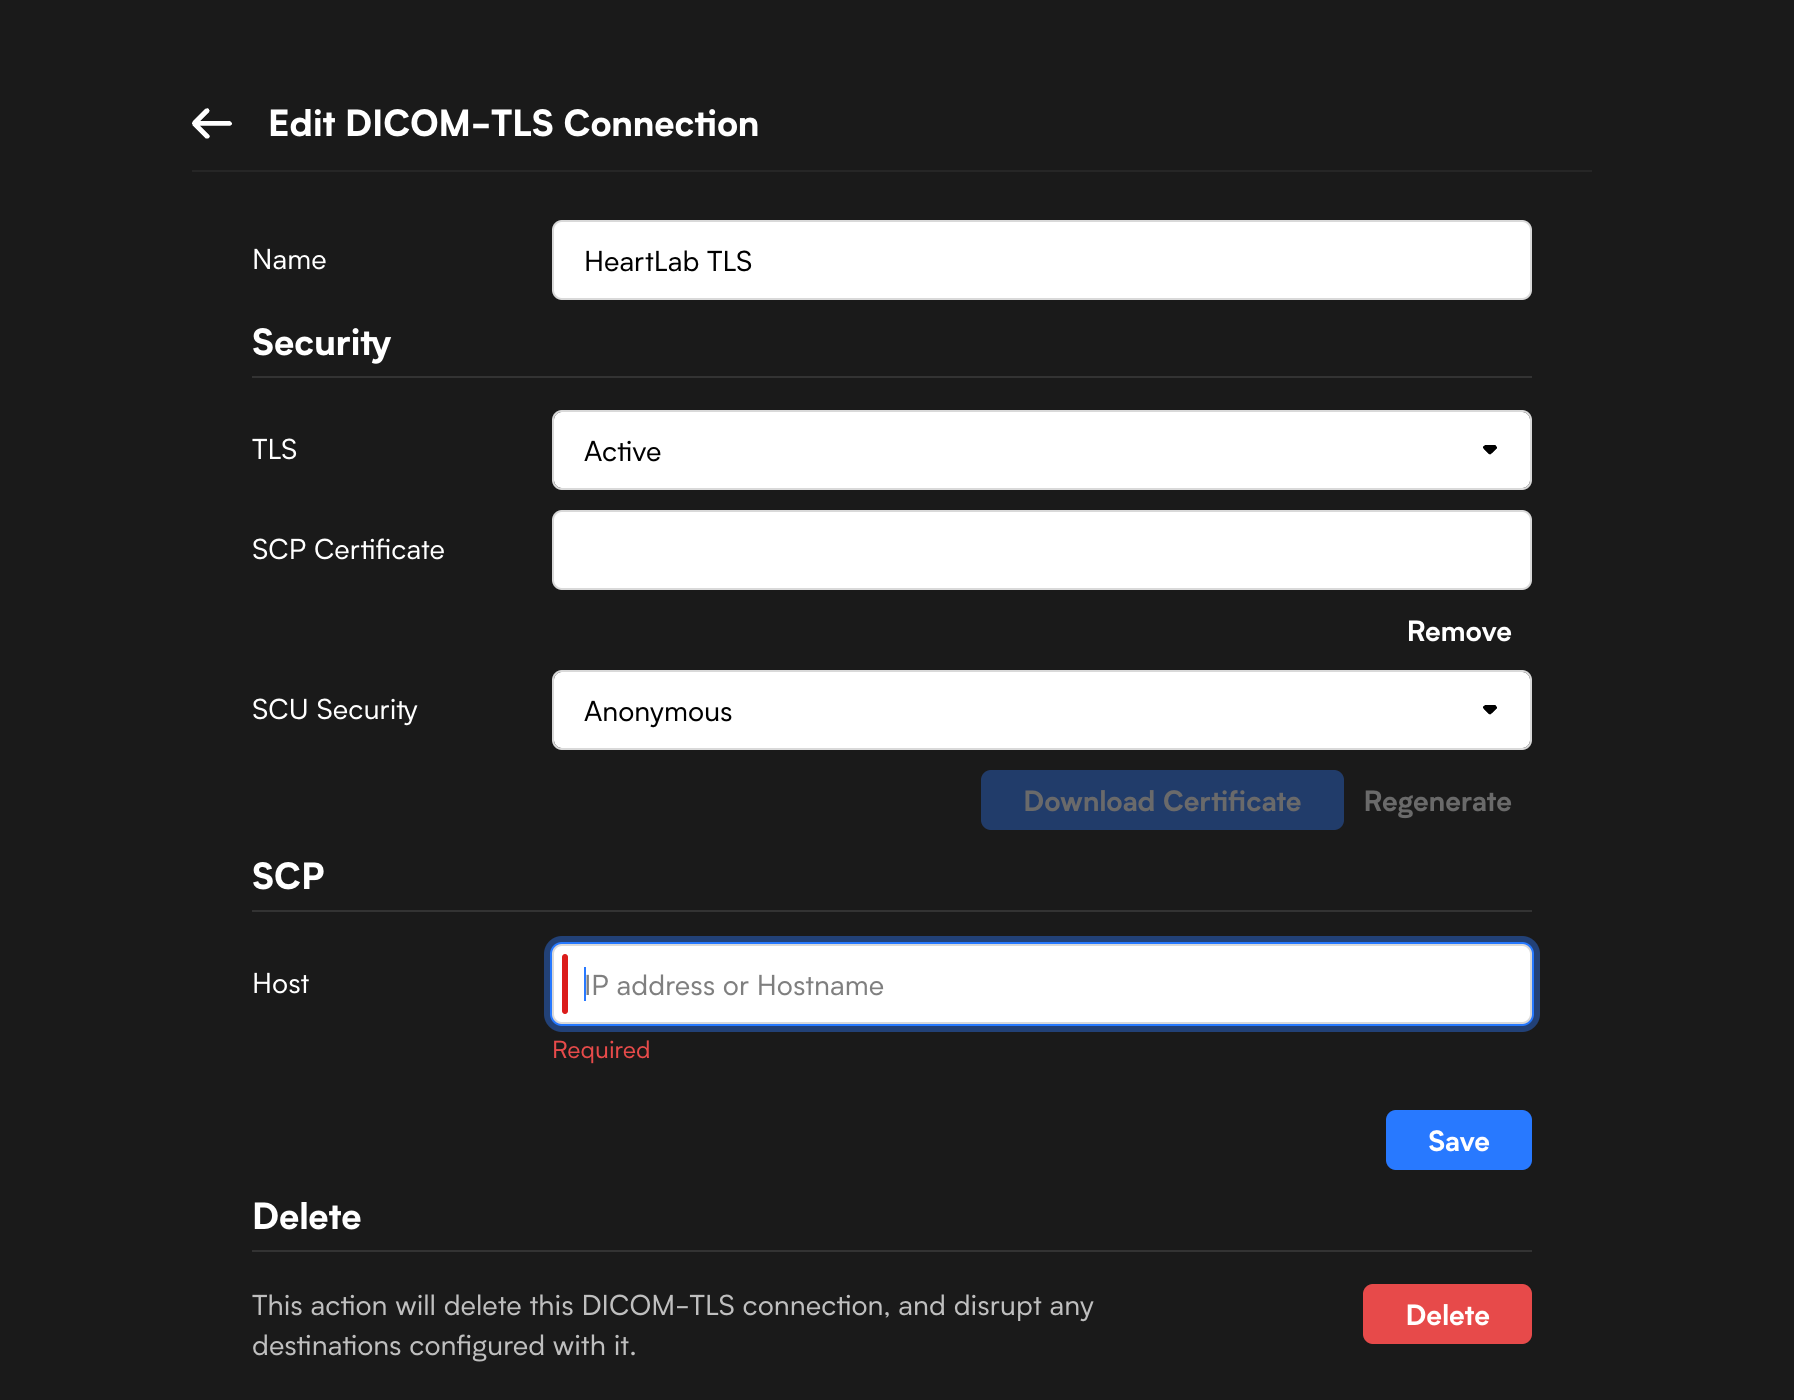
- Configure the following fields:
| Field | Value |
|---|---|
| Name | Connection nickname of your choice |
| TLS | Active |
| SCP Certificate | Upload the downloaded .pem certificate |
| SCU Security | Anonymous |
| SCP Host | HeartLab Server IP Address |
- Select Save.
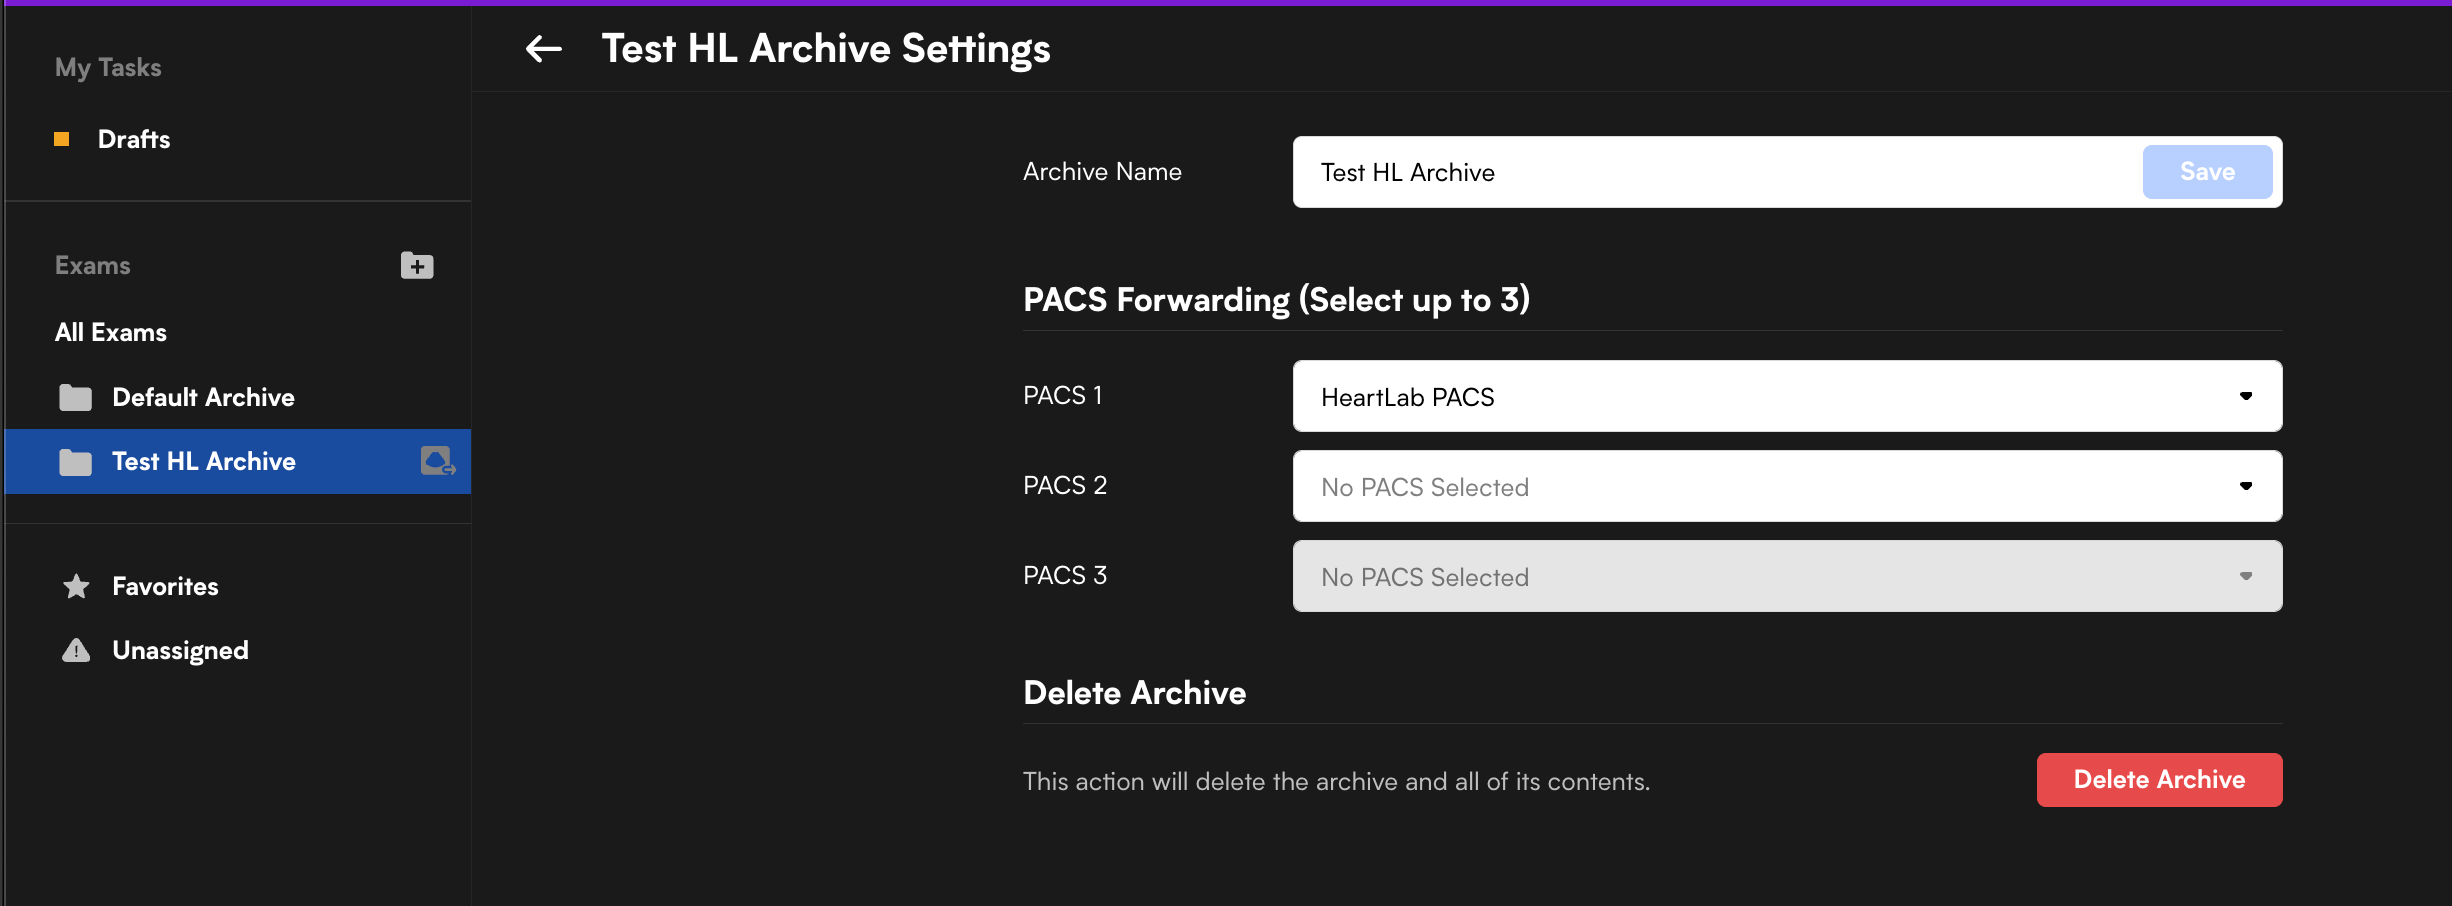
Add the PACS Endpoint to Butterfly
After creating the TLS connection:
- Navigate to:
- Organization Settings → Connectivity
- Select + Add beside Integrations.
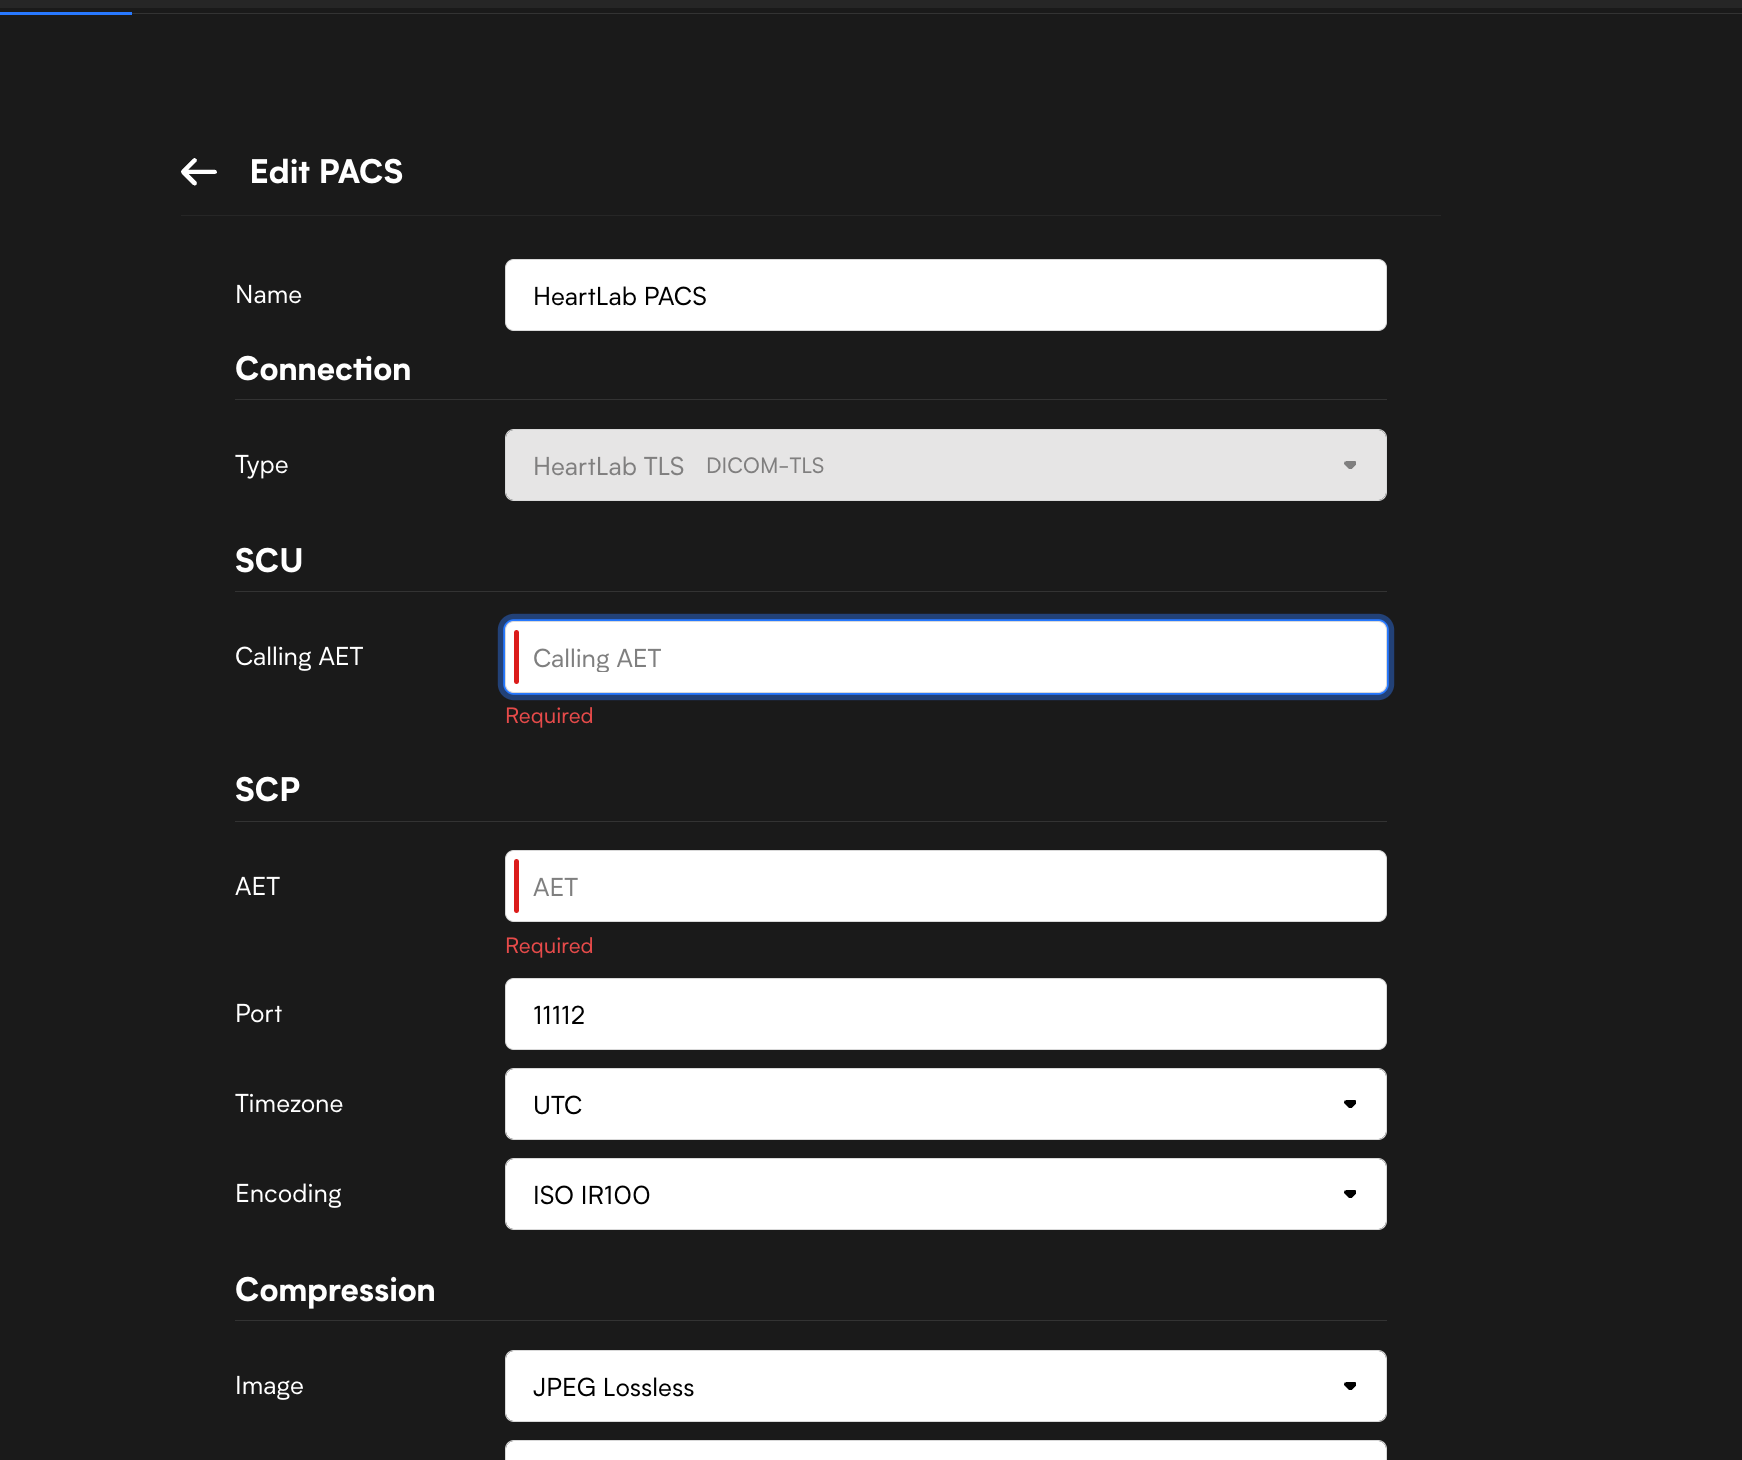
- Configure the following fields:
| Field | Value |
|---|---|
| Name | PACS nickname of your choice |
| Type | Select the TLS connection created earlier |
| Calling AET | Device AE Title created in HeartLab |
| AET | HeartLab Server AE Title |
| Port | 11112 |
The Calling AET in Butterfly must exactly match the Device AE Title configured in the HeartLab DICOM Identity.
- Configure compression and timeout settings as preferred.
- If unsure, leave the default settings unchanged.
- Save the integration.
Configure Automatic Sending to HeartLab
To automatically export studies from Butterfly to HeartLab:
- On the Butterfly Network main page, open:
- Exams
- Create a new archive or select an existing archive.
- Open the archive settings.
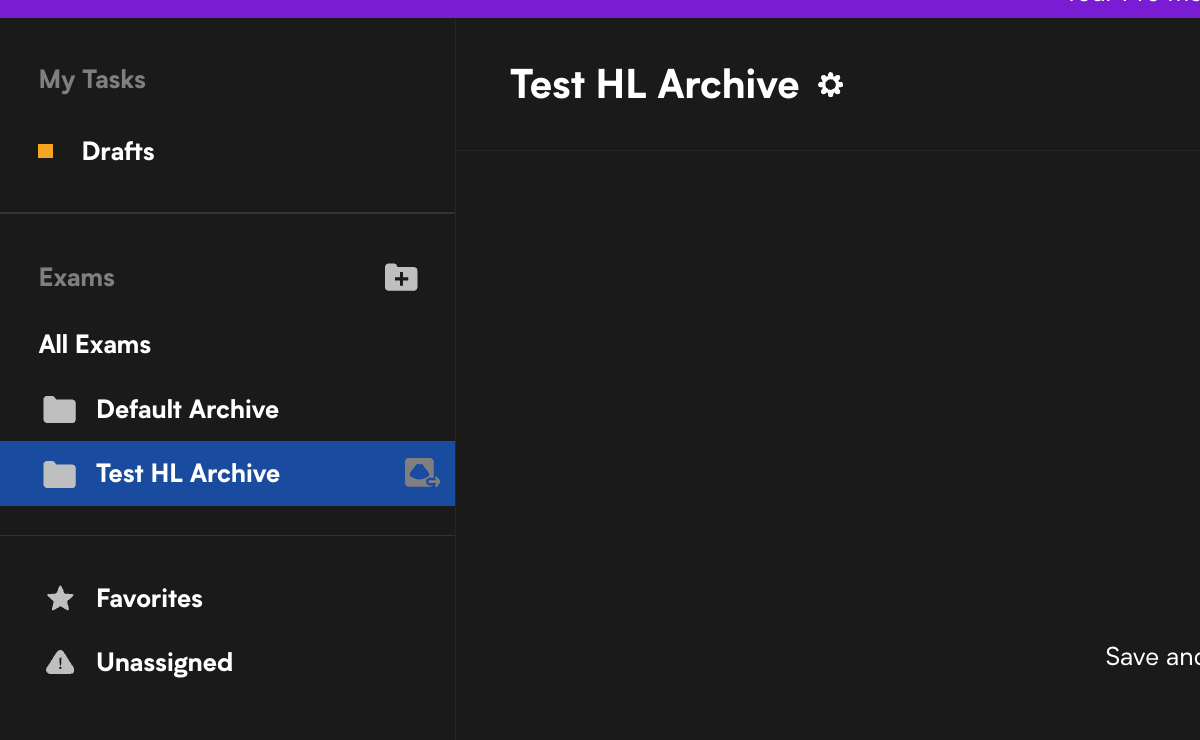
- Select the PACS integration created earlier.
Once configured, studies saved to that archive will automatically send to HeartLab.
Troubleshooting
Common causes of failed DICOM sends include:
- AE Title mismatch
- Incorrect IP address or port
- TLS certificate upload issues
- Incorrect connection type selection
Recommended troubleshooting steps:
- Verify all AE Titles exactly match
- Confirm the TLS certificate uploaded successfully
- Confirm the correct port (
11112) is configured - Send a single test study before enabling automatic export globally