Connectivity
HeartLab Agent
Install and configure the HeartLab Agent for automated report delivery.
HeartLab Agent
The HeartLab Agent is a Windows application that enables automated delivery of finalized HeartLab reports to local directories.
The HeartLab Agent is currently only supported on Windows.
Installing the HeartLab Agent
It is recommended to install the HeartLab Agent on:
- A machine that remains powered on
- A machine that remains logged in regularly
- A stable network connection
This helps ensure reliable report delivery.
To install the HeartLab Agent:
- Navigate to Settings → Integrations → Agent
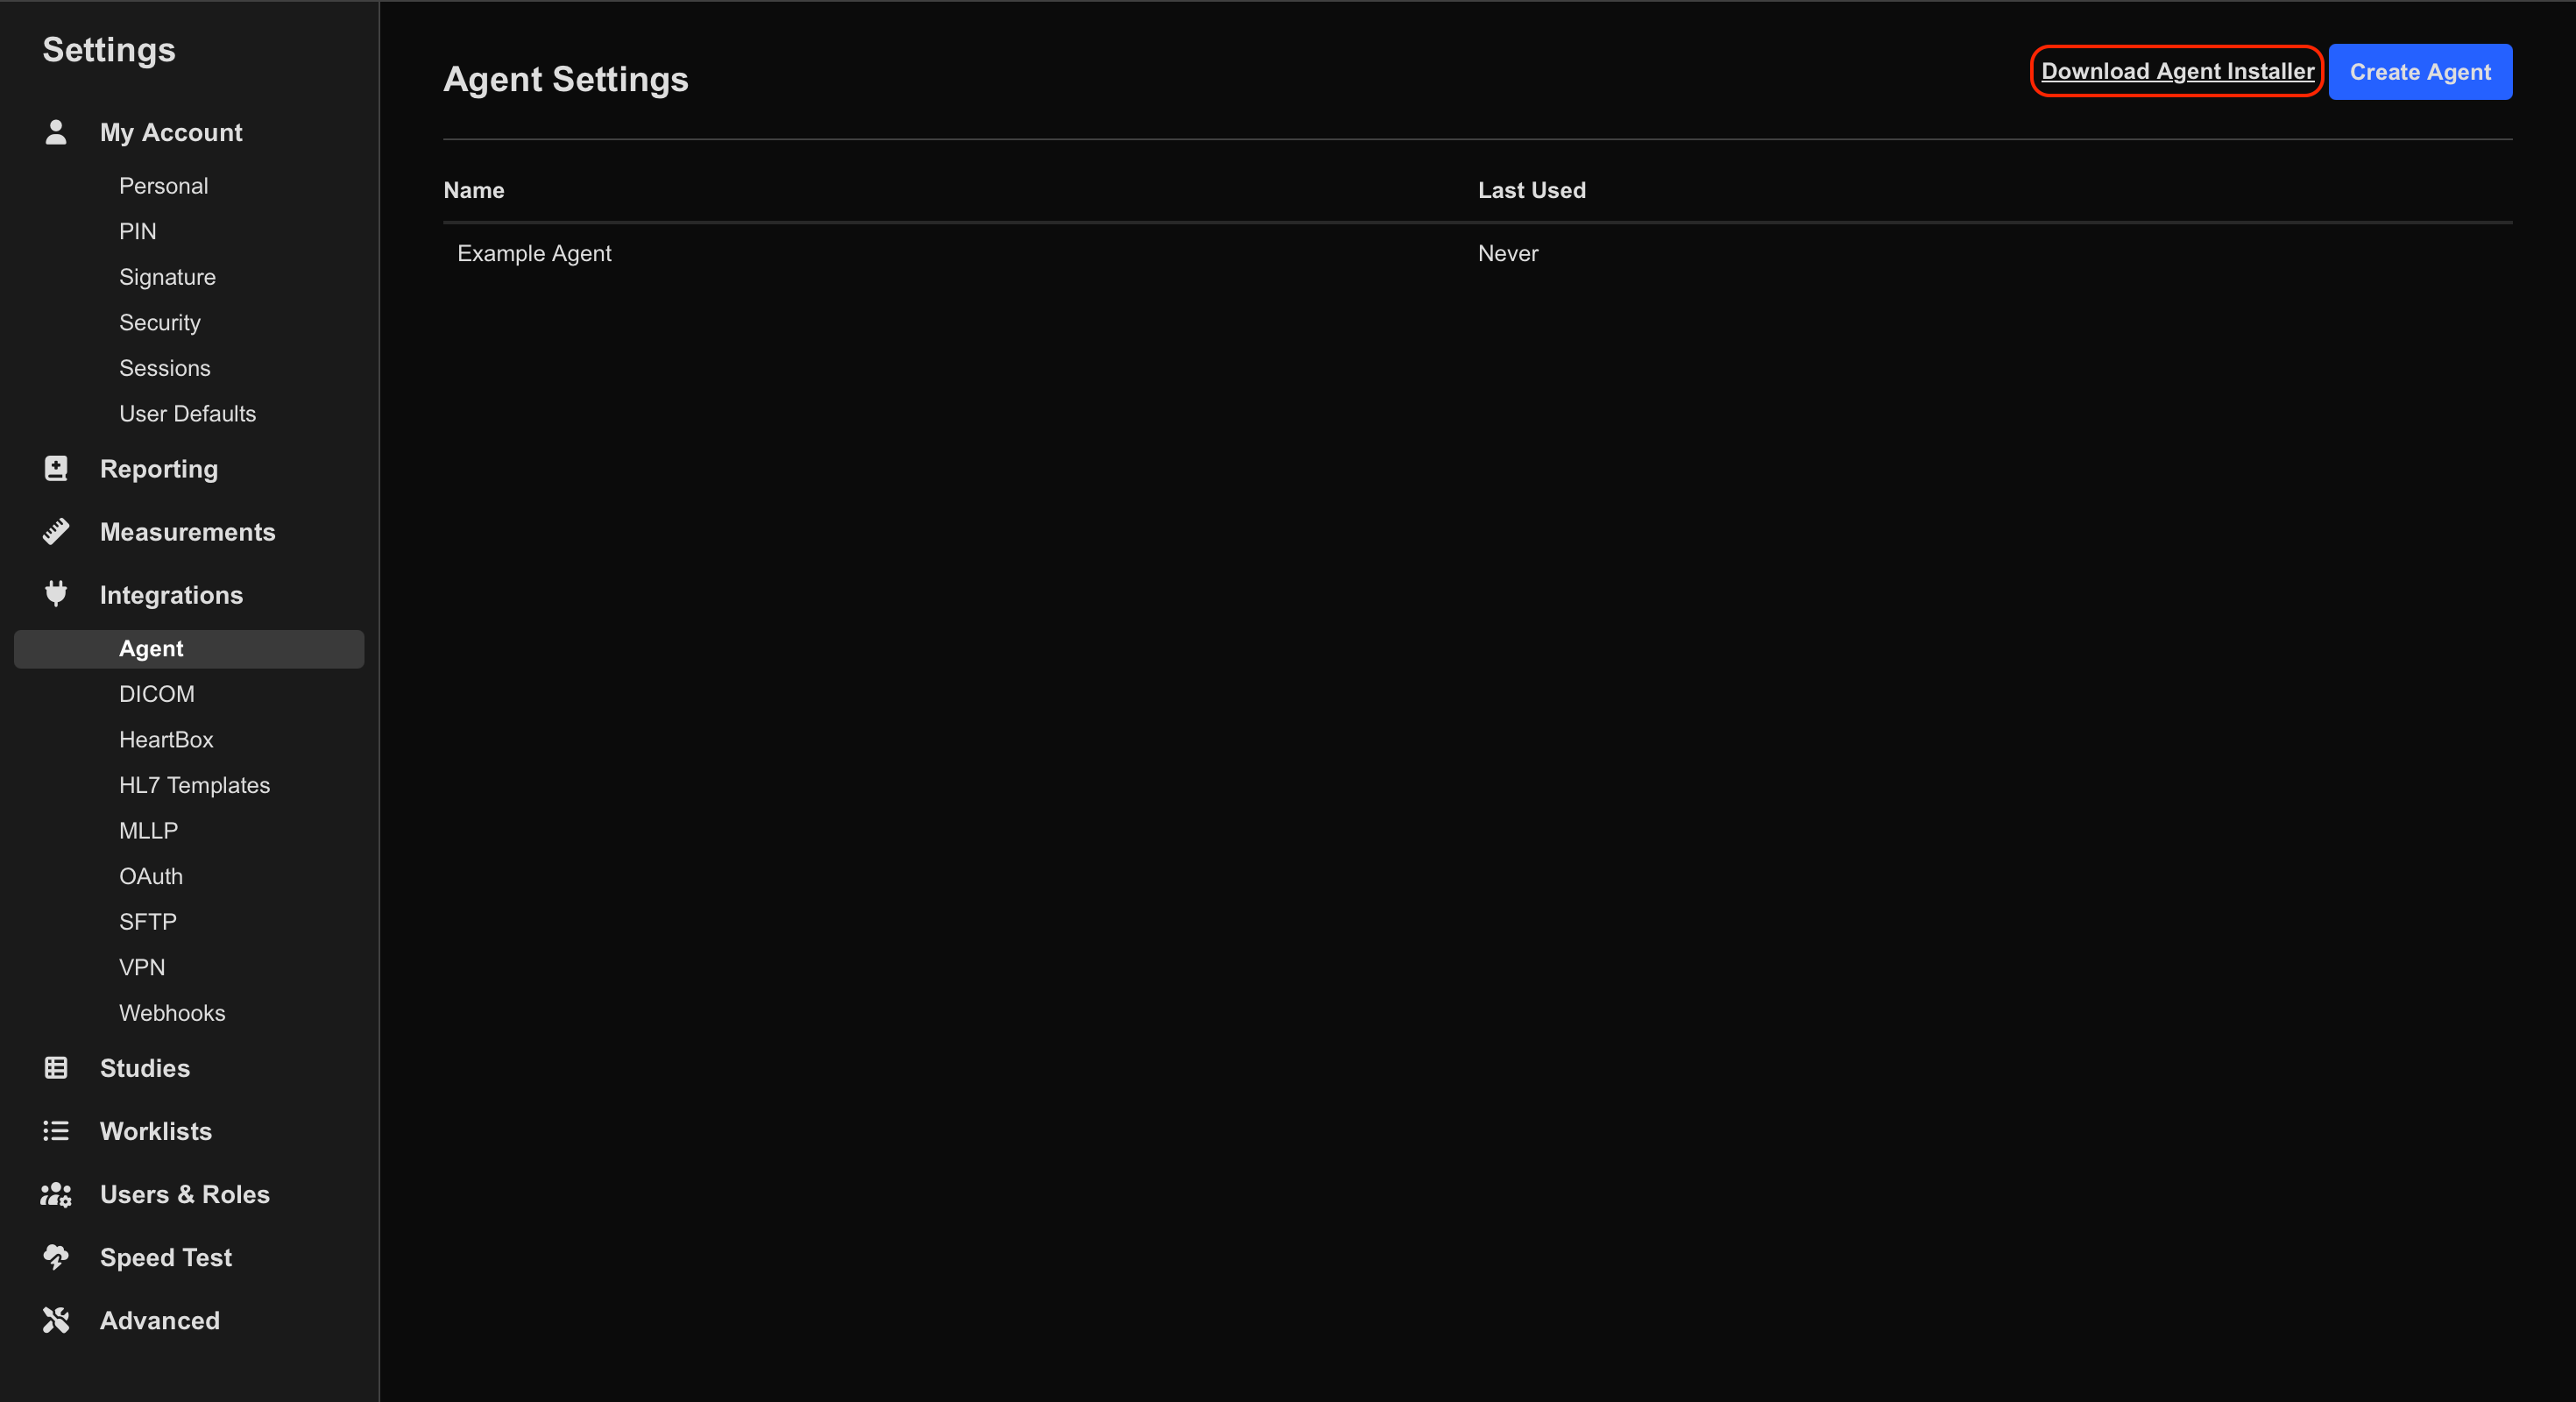
- Click Download Agent Installer
- Run the downloaded Windows installer.
- Complete the installation process.
Once installed:
- The Agent runs in the Windows system tray
- The Agent does not appear in the Windows taskbar
Configure the HeartLab Agent
After installation:
- Navigate to Settings → Integrations → Agent
- Click Create Agent
- Enter an Agent name and select Create Agent
- Record the following information:
- Agent URL
- Agent Token
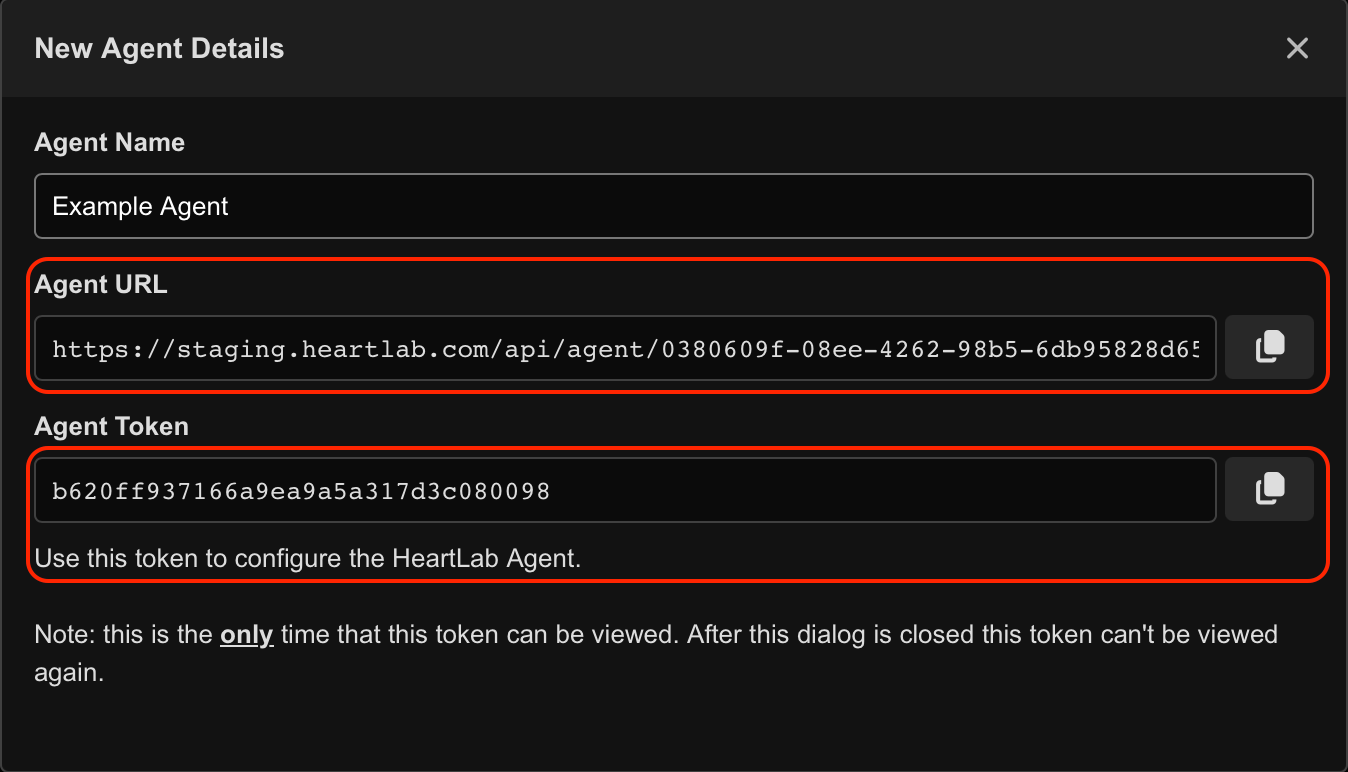
The Agent Token is only displayed once and cannot be viewed again after creation.
- Open the HeartLab Agent application.
- Navigate to Authentication
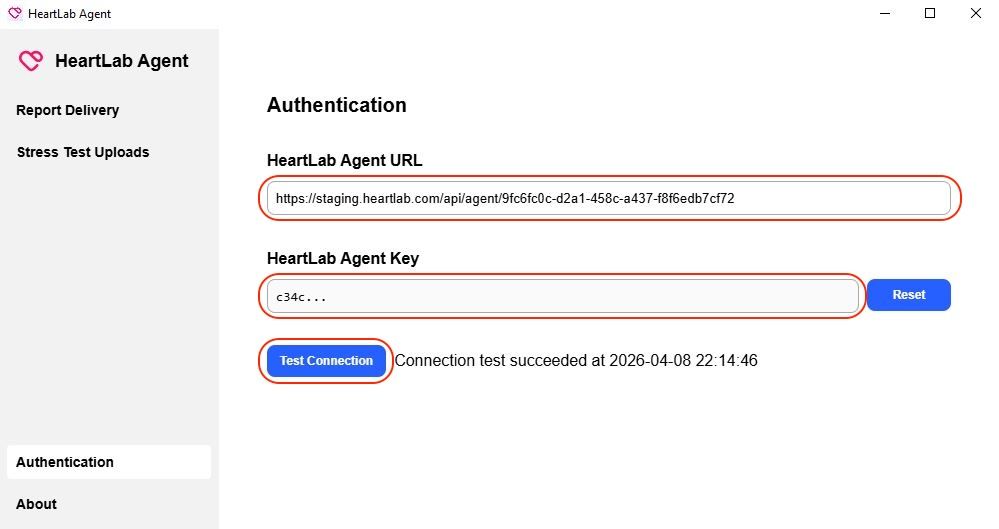
- Enter:
- Agent URL
- Agent Token
- Select Test Connection
- Confirm the message:
Connection test succeeded
Configure Report Deliveries
The HeartLab Agent can automatically save finalized reports to a local directory.
Configure the Agent
- Open the Report Deliveries tab
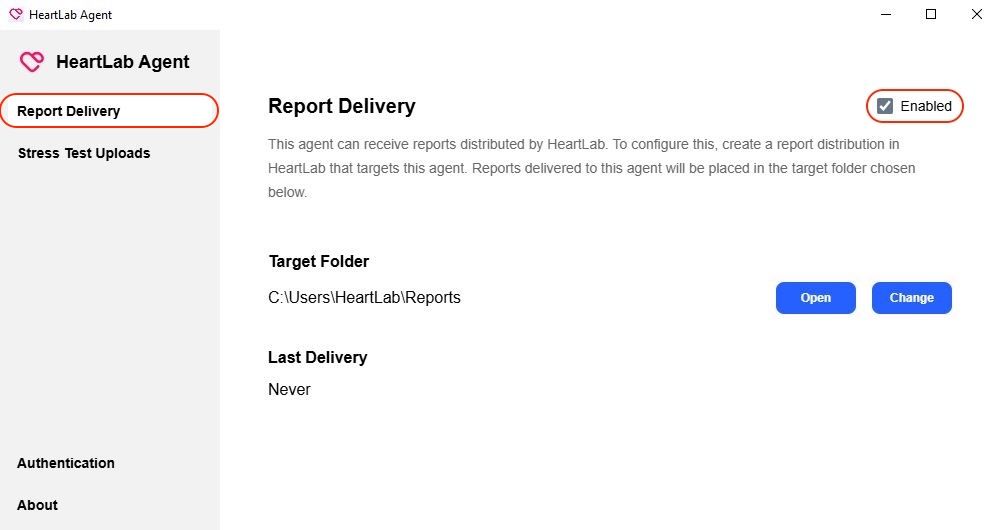
- Enable Report Deliveries
- Select the destination directory.
Configure Report Distribution
- Navigate to Settings → Reporting → Distributions
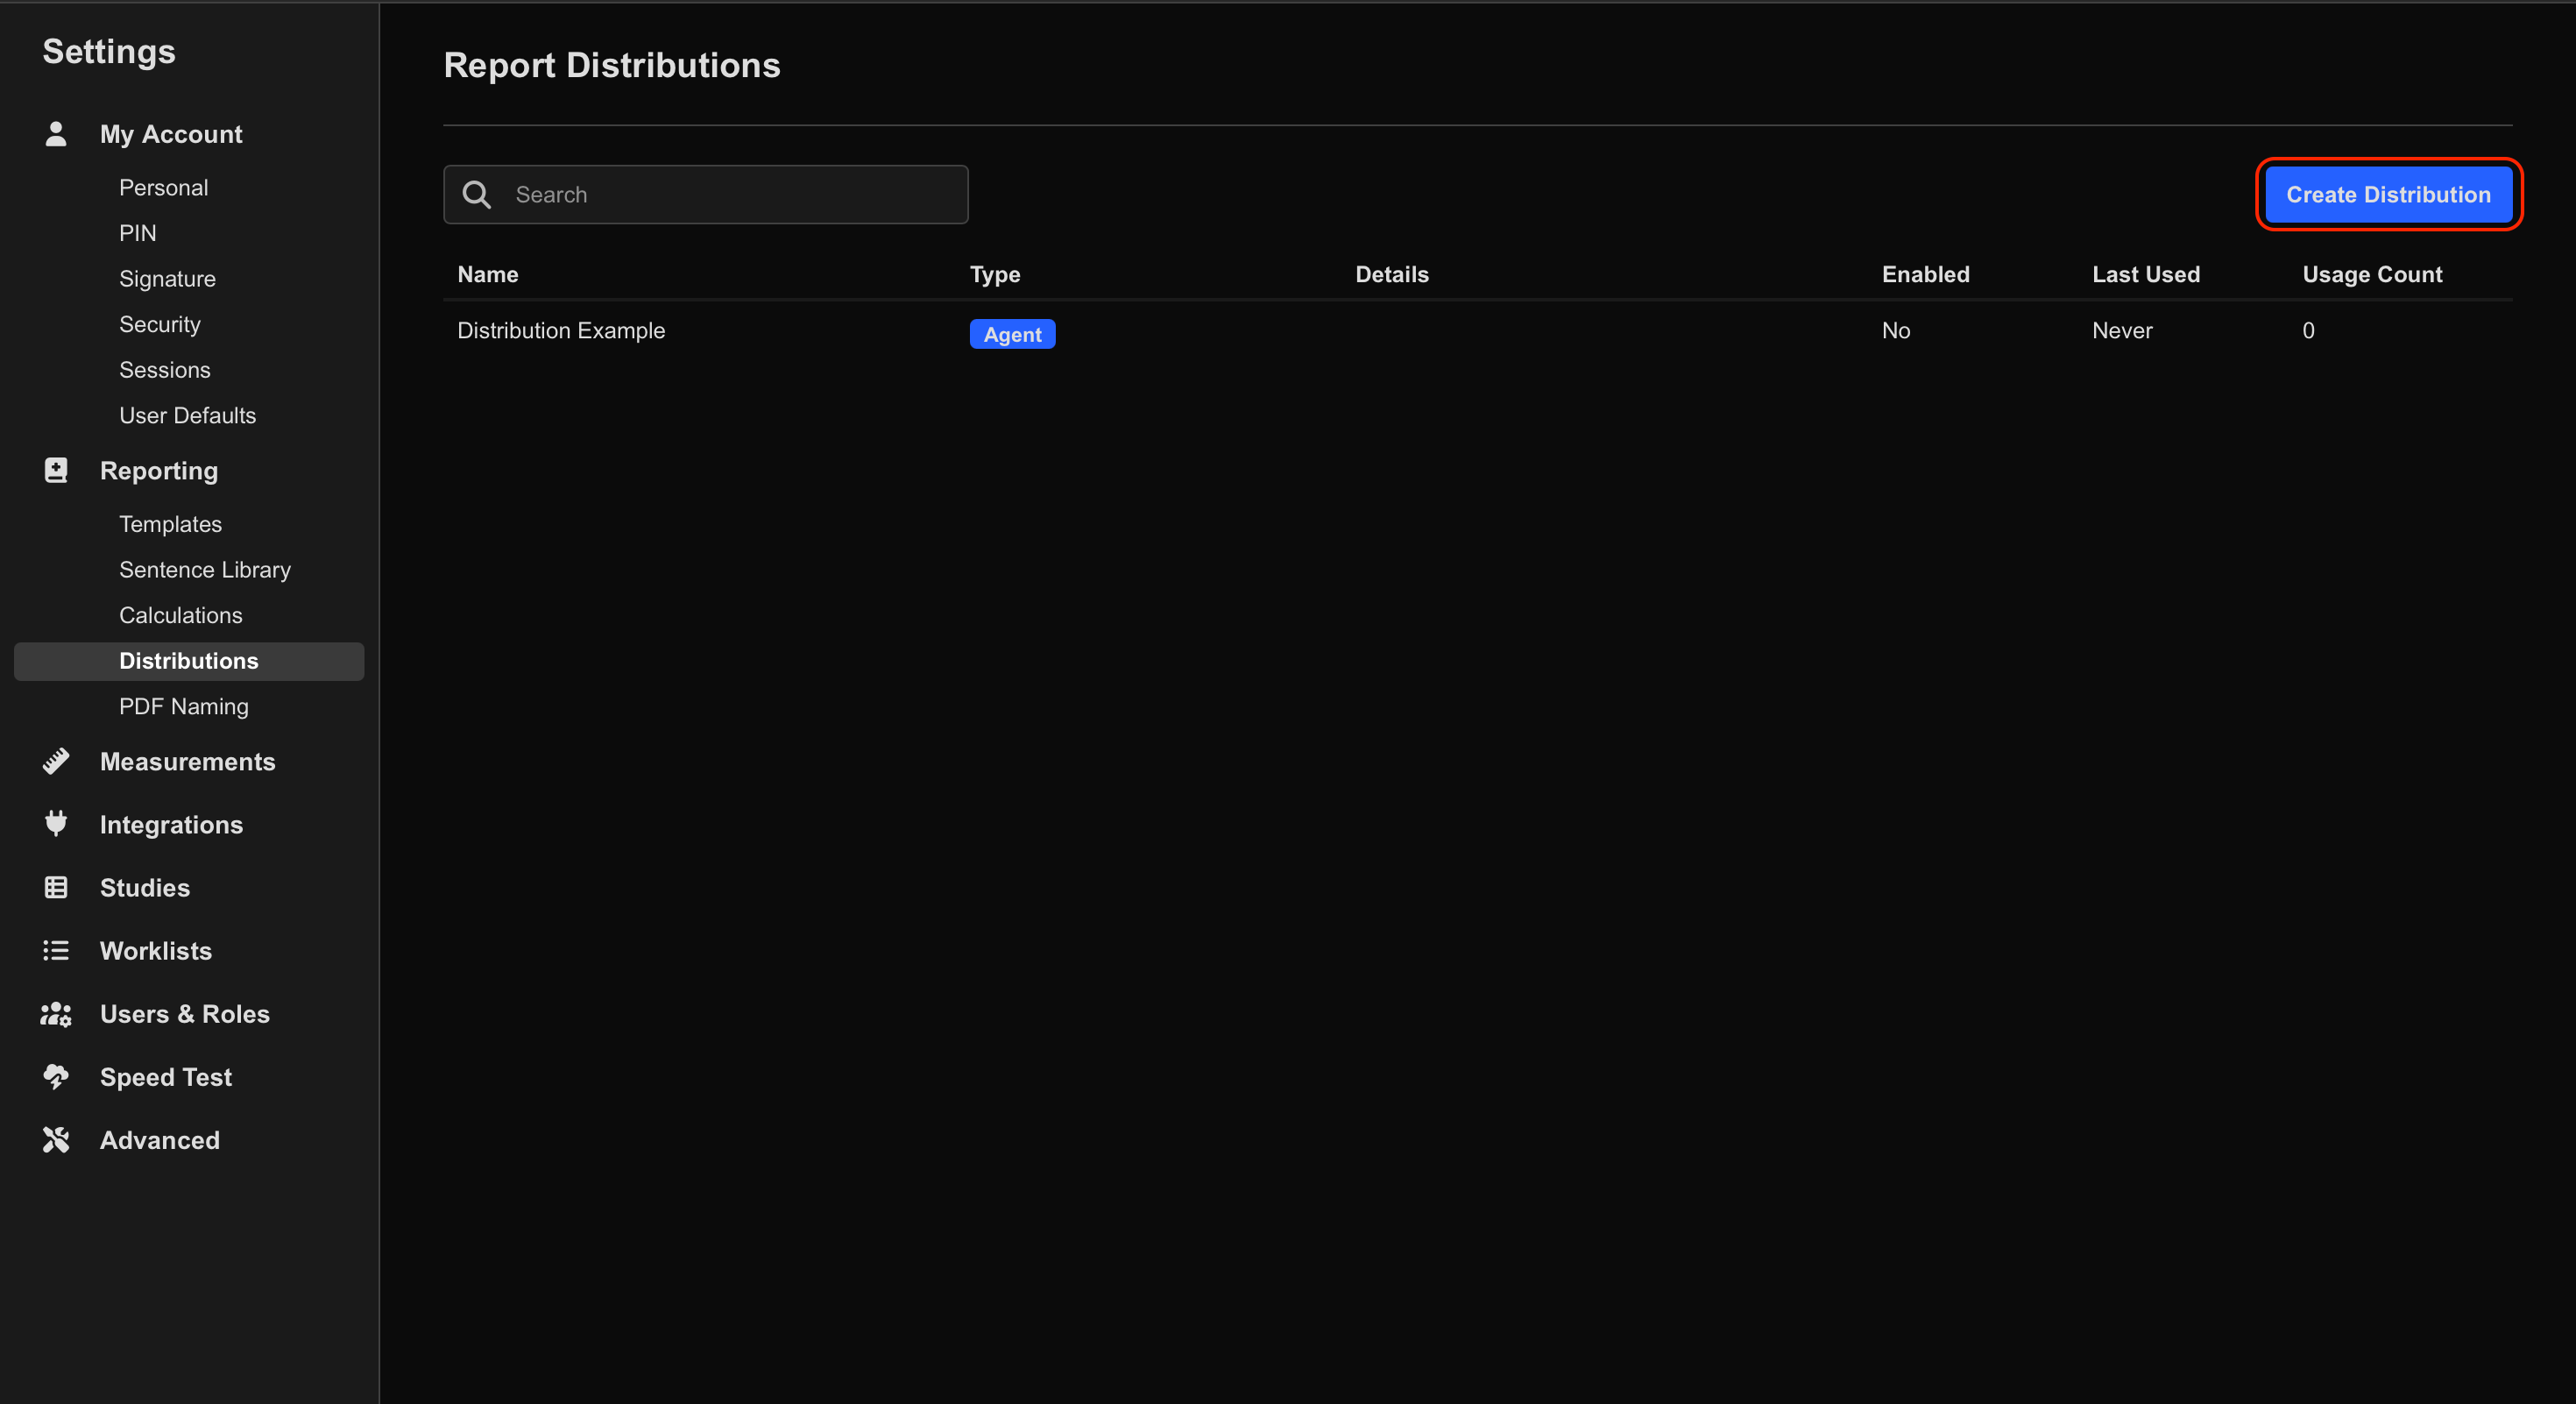
- Select Create Distribution
- Select Agent as the distribution type.
If Agent is not available as a distribution type, contact HeartLab Support to enable the feature.
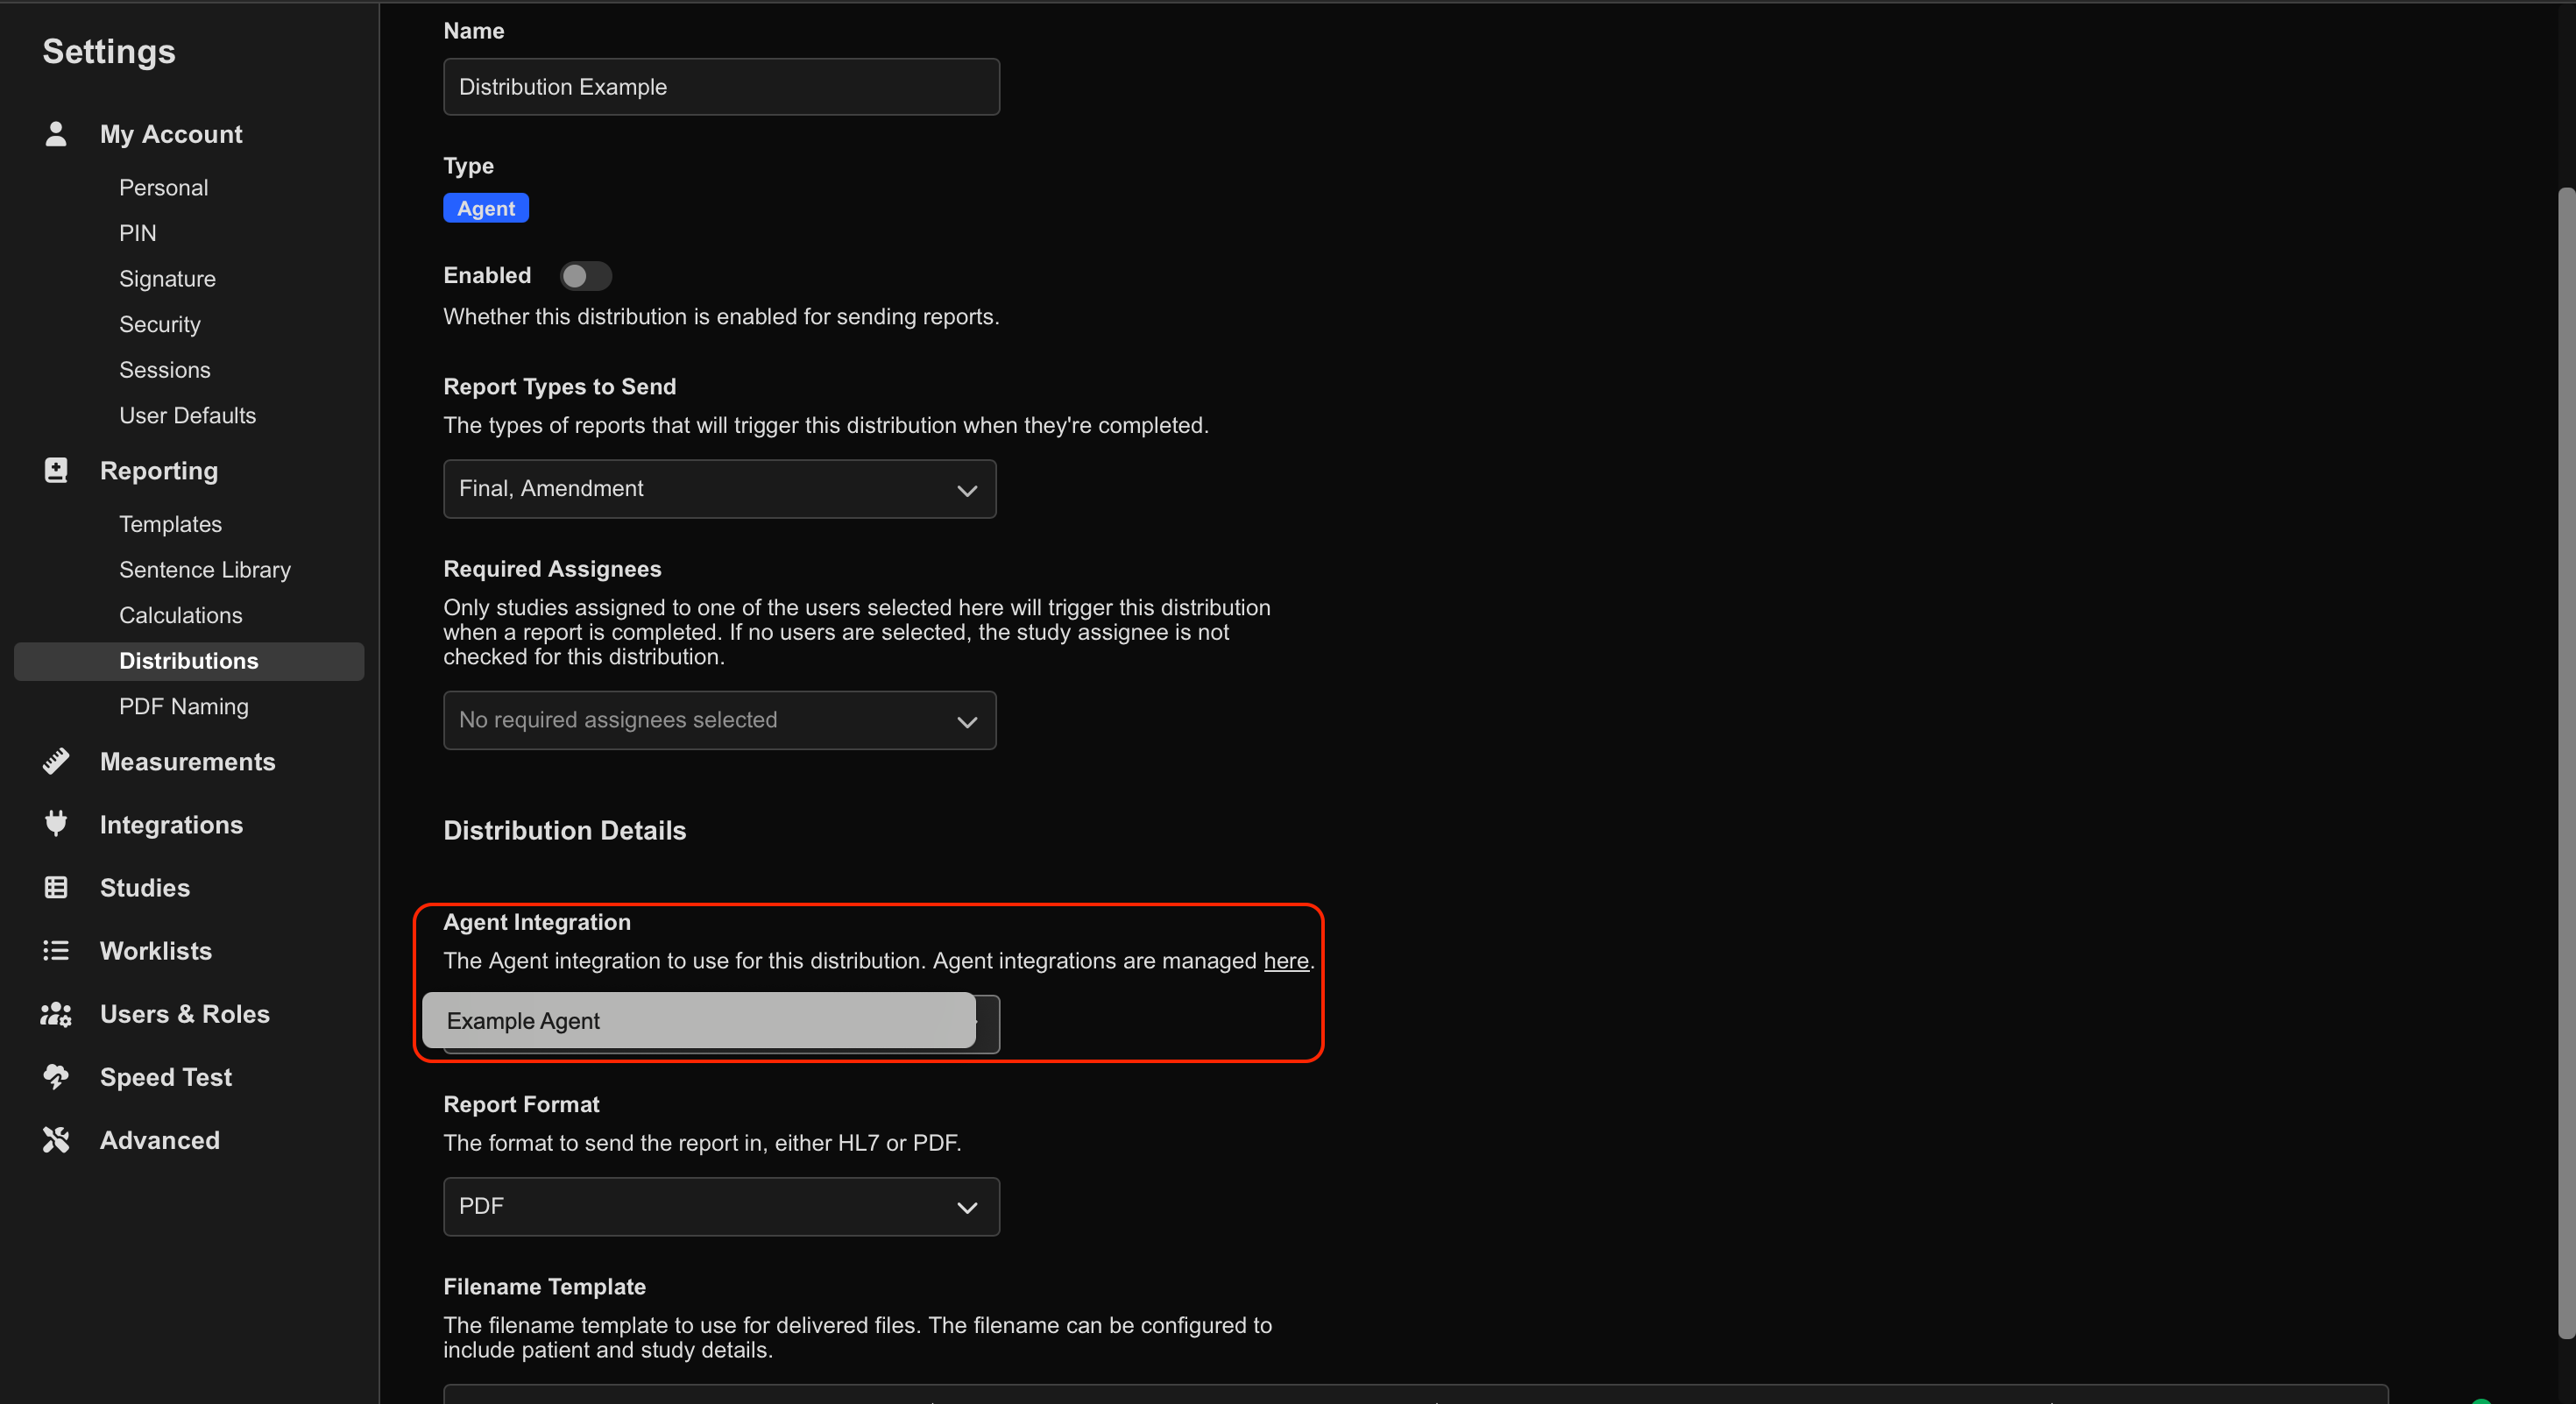
- Select the Agent integration.
- Configure:
- File format
- File naming convention
Verify Delivery
- Finalize a report in HeartLab.
- Confirm the distribution appears in the Study List.
Delivery to the Agent may take up to one minute after report finalization.
If successful:
- The report appears in the configured directory
- The filename follows the configured naming convention
- The file format matches the configured distribution settings
Troubleshooting
Common causes of failed deliveries include:
- Invalid Agent Token
- Network connectivity issues
- Incorrect folder permissions
- Agent service not running
If report delivery fails:
- Verify the Agent is online
- Re-run the connection test
- Confirm folder permissions allow write access
- Review Agent logs for additional details